Connecting your own to Bask
Connecting a domain to Bask is an essential part of white-labeling your telehealth platform.
After you purchase a domain from a third-party domain provider, such as Google Domains, GoDaddy, or 1&1 IONOS, you need to connect your domain to your Bask storefront. Connecting your domain points your URL to your Bask questionnaires and patient portal so that patients can enter that URL into their web browser to visit your business.
Bask uses your A and CNAME records to point a domain.
Host: {Value From Bask}
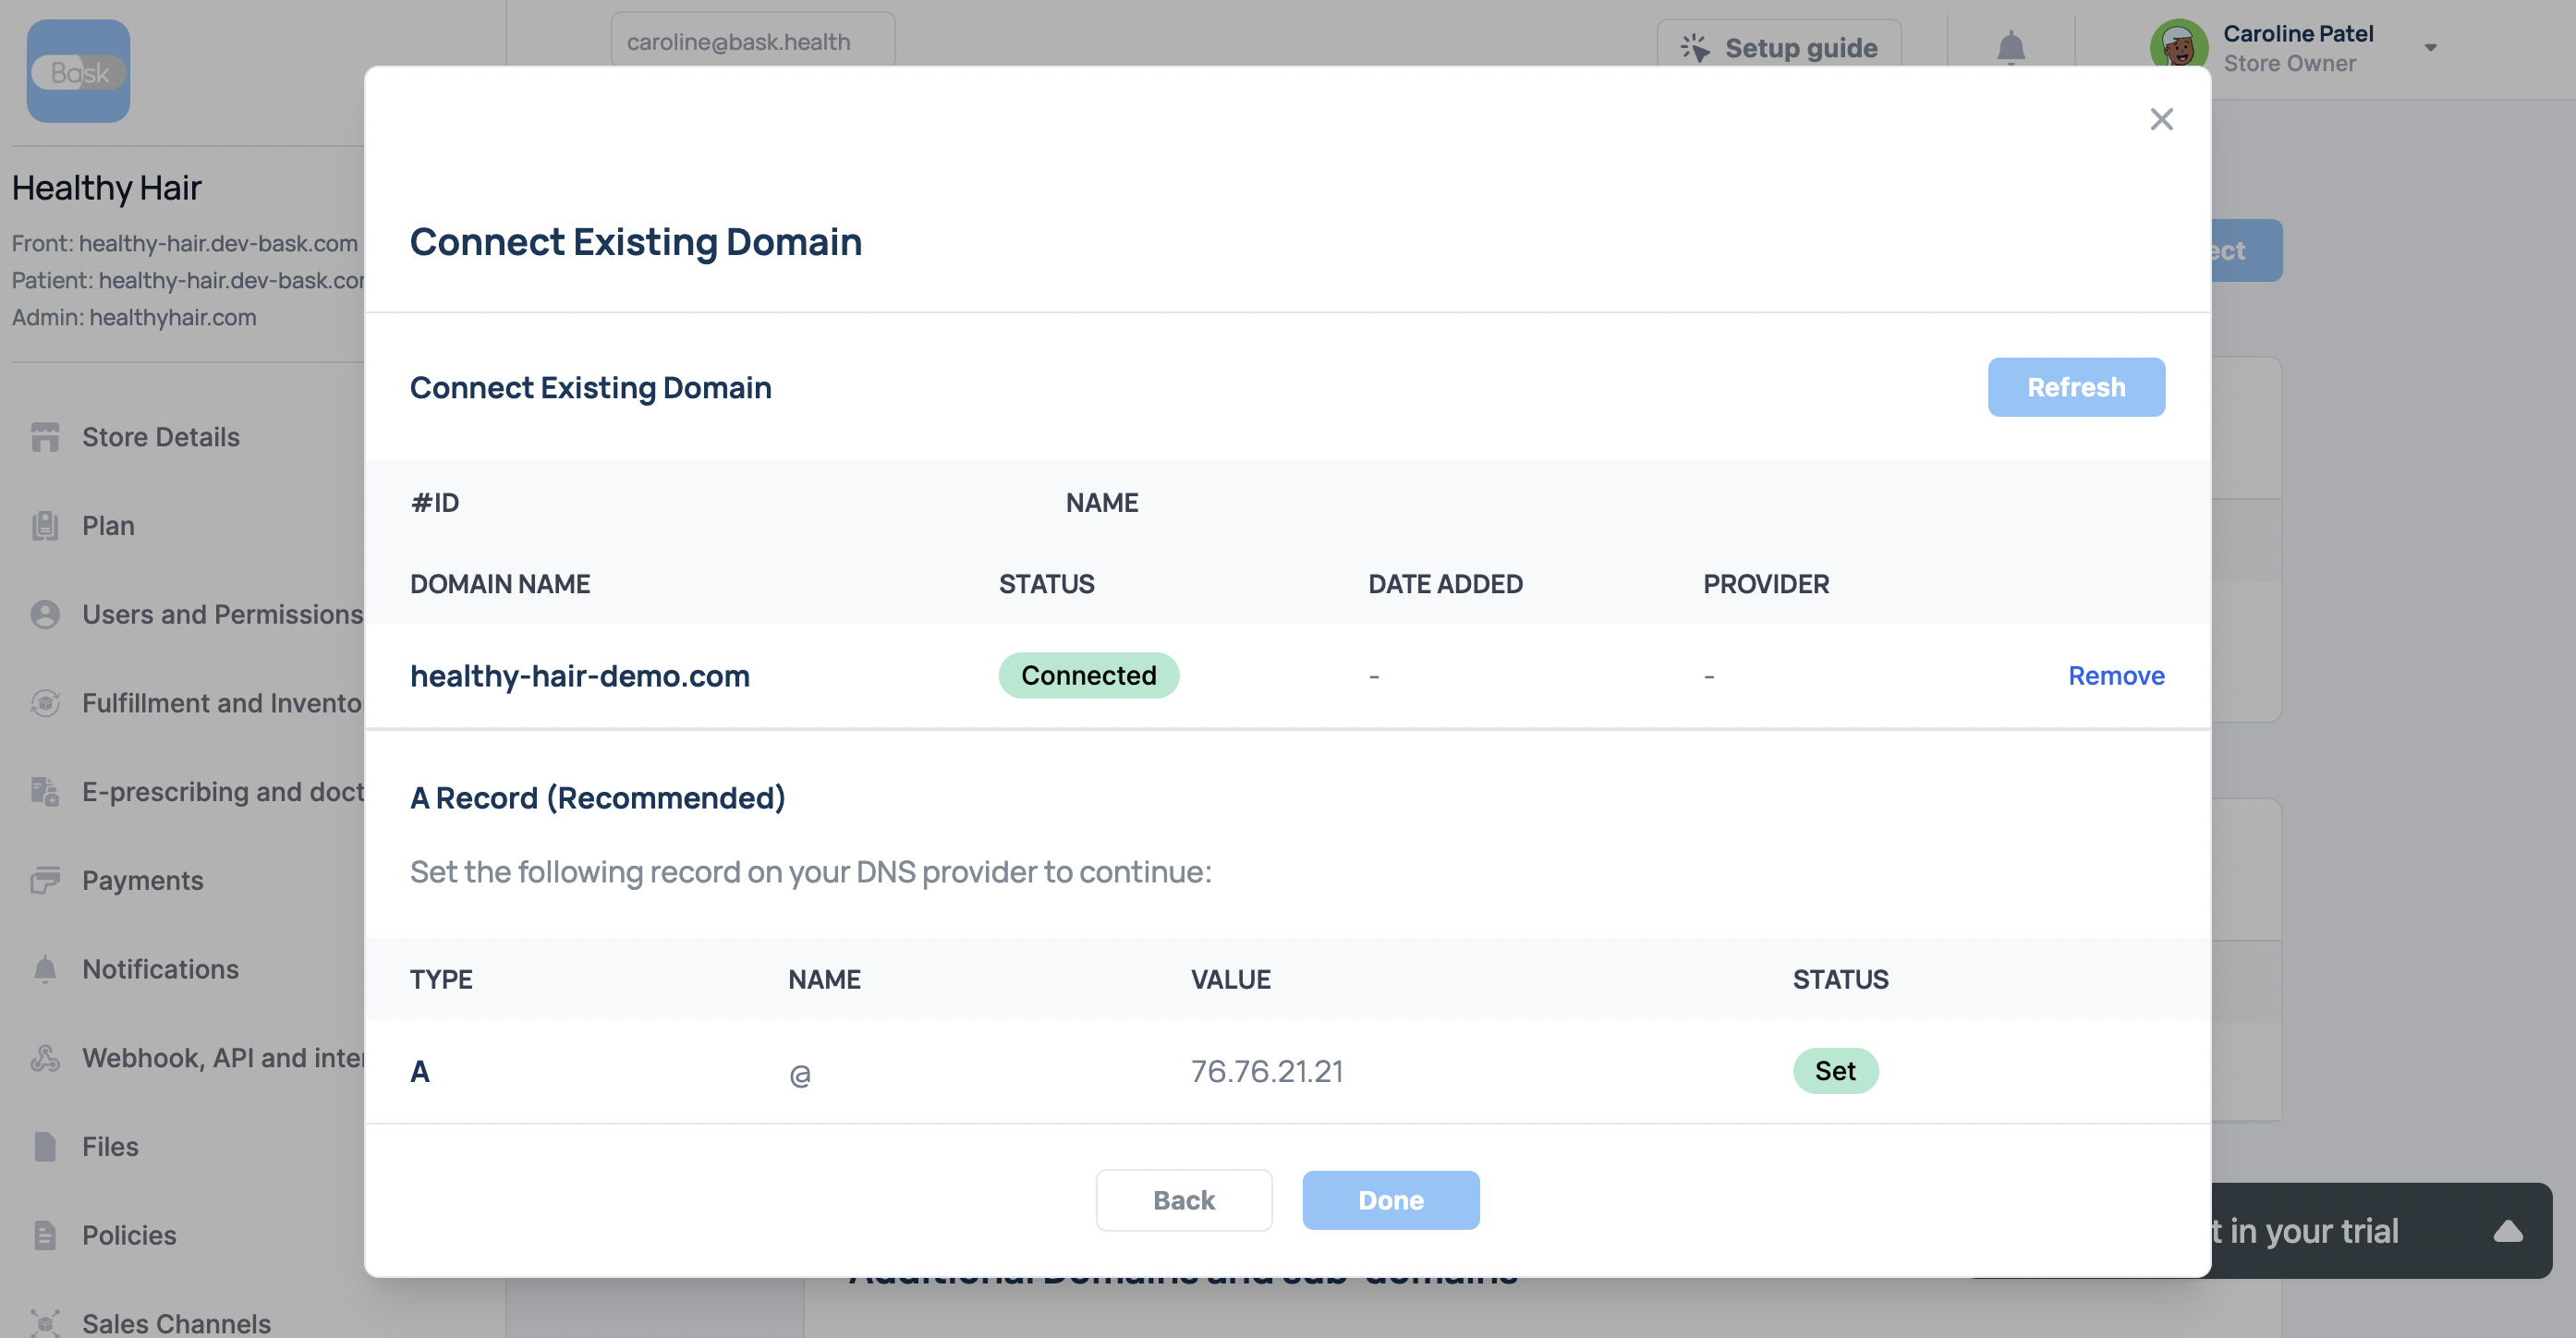
76.76.21.21Third-party DNS requirements
If you own a domain from one of the following providers, then click the link to get the specific requirements for connecting your domain.
1&1 IONOS (opens in a new tab), 123 Reg (opens in a new tab), Blacknight Solutions (opens in a new tab), Bluehost (opens in a new tab), Domain.com (opens in a new tab), Enom (opens in a new tab), GoDaddy (opens in a new tab) Google Domains (opens in a new tab), HostGator (opens in a new tab), Namecheap (opens in a new tab), Network Solutions (opens in a new tab), OVHcloud (opens in a new tab), Register (opens in a new tab), Wix (opens in a new tab)
What is a subdomain?
A subdomain is a subset of your root domain that you add as a prefix to your domain, such as www (opens in a new tab). For example, in the URL help.mybaskhealth.com, mybaskhealth.com is the root domain and help is the subdomain. If you have a Bask-managed domain, then you can add subdomains for free from your Bask admin.
How do I connect a domain to my questionnaire or landing pages?
Step 1
To add a custom domain, begin in the main dashboard and select the "Settings" tab from the sidebar. Scroll down and click on the "Domains" page.
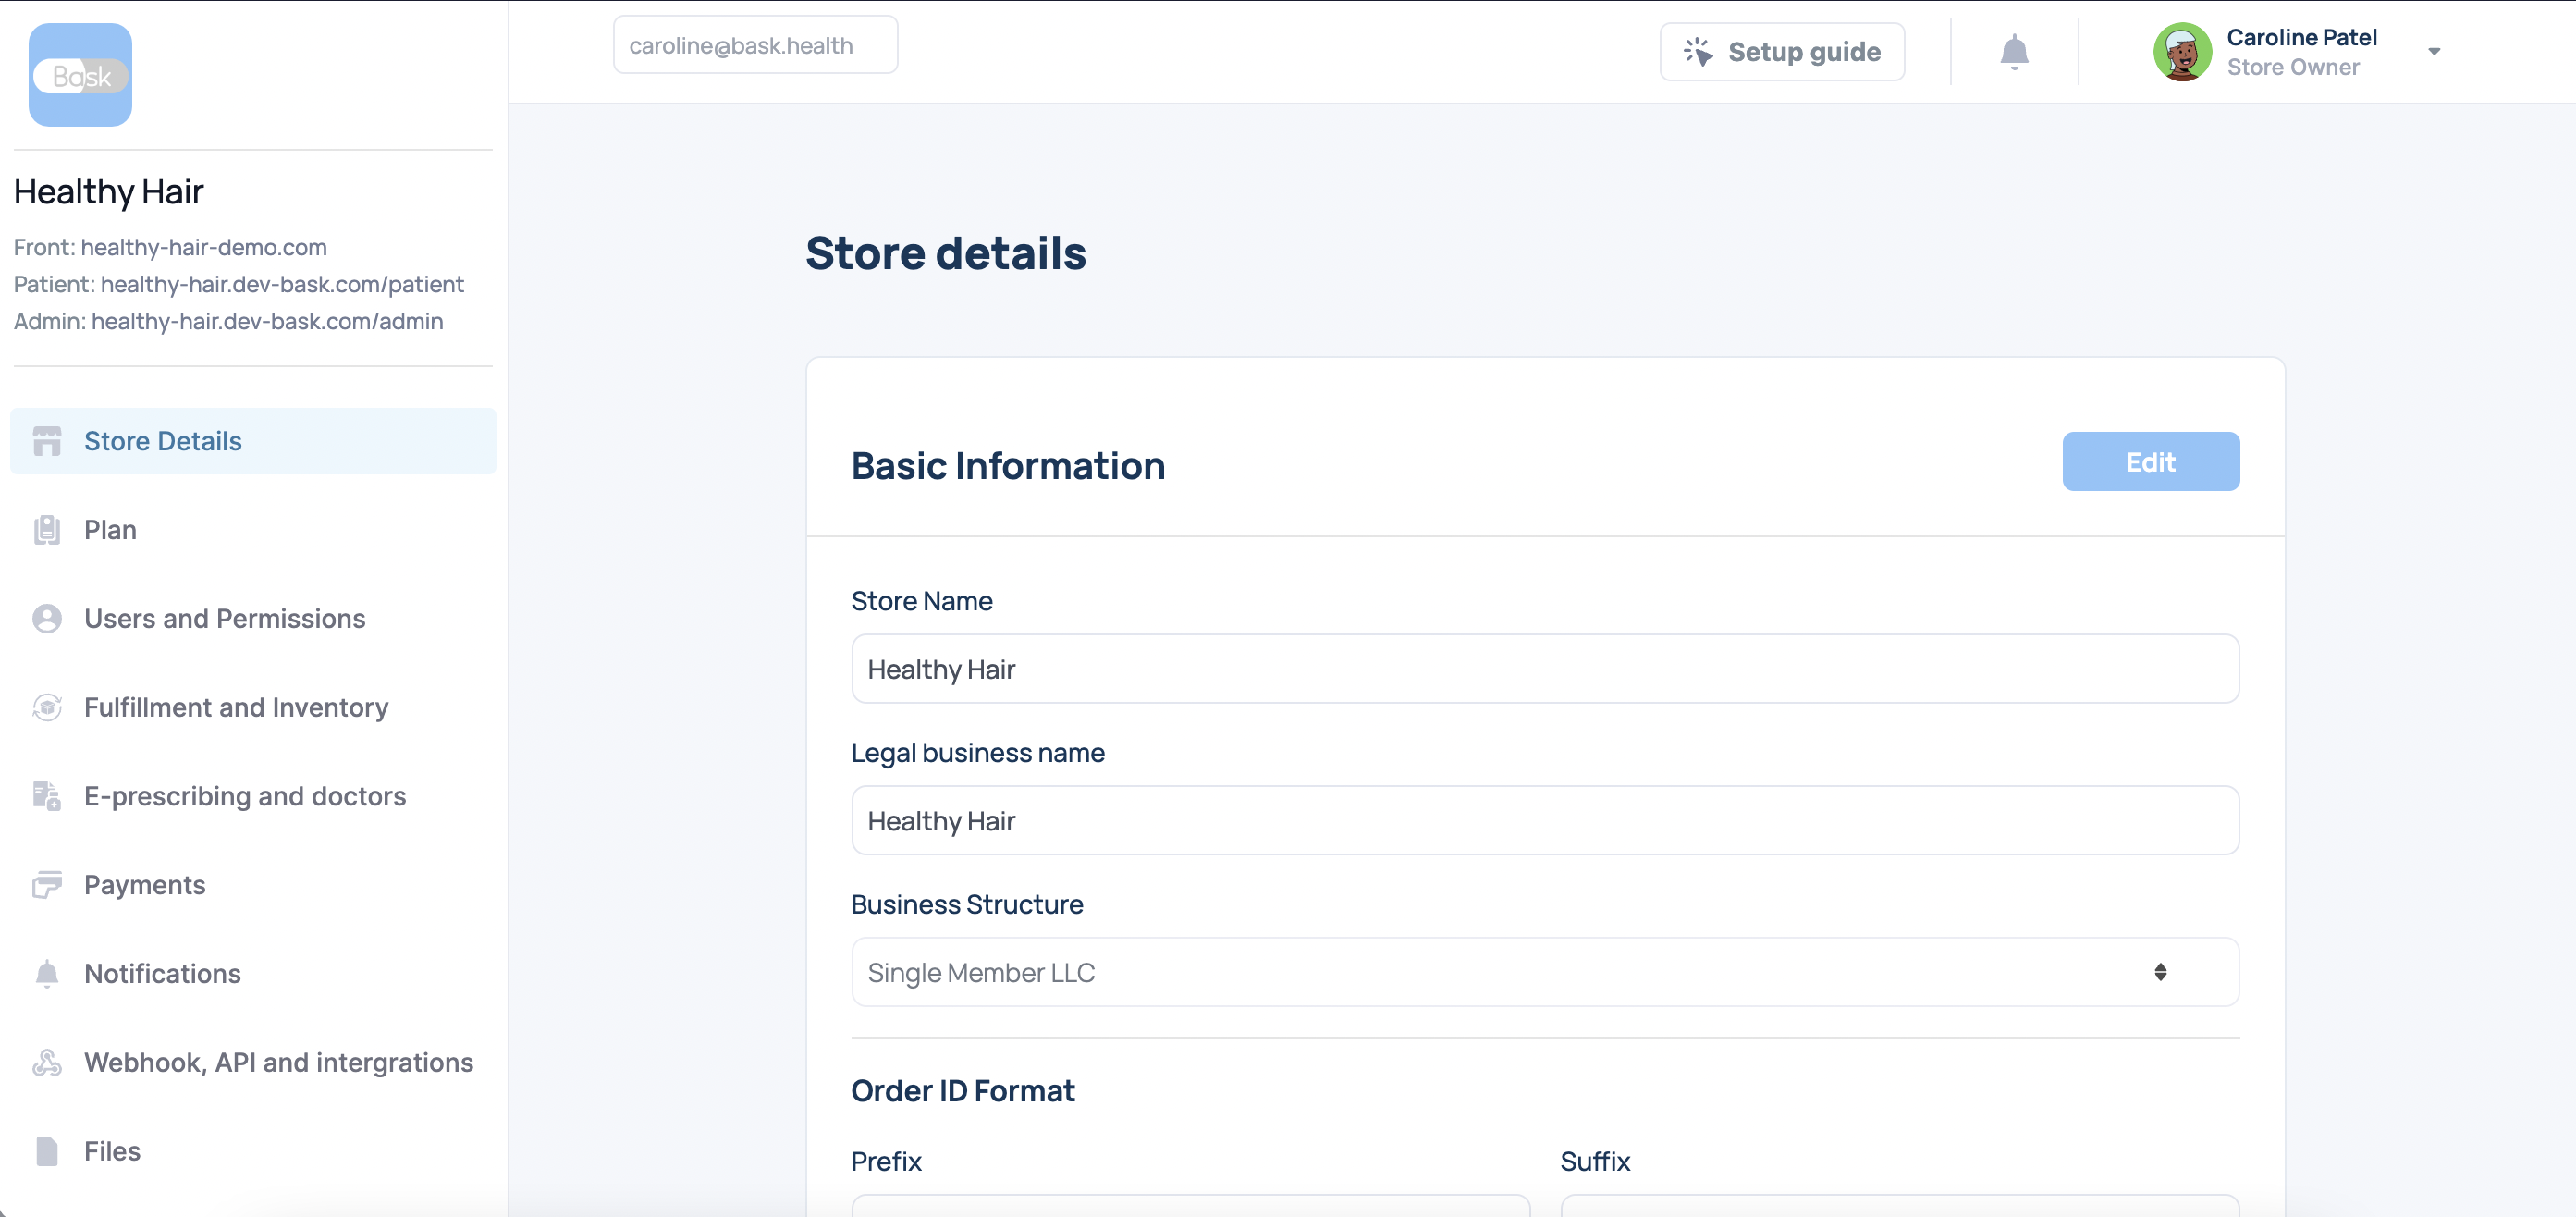
Step 2
The domains page is where you will be able to add and view your custom domains.
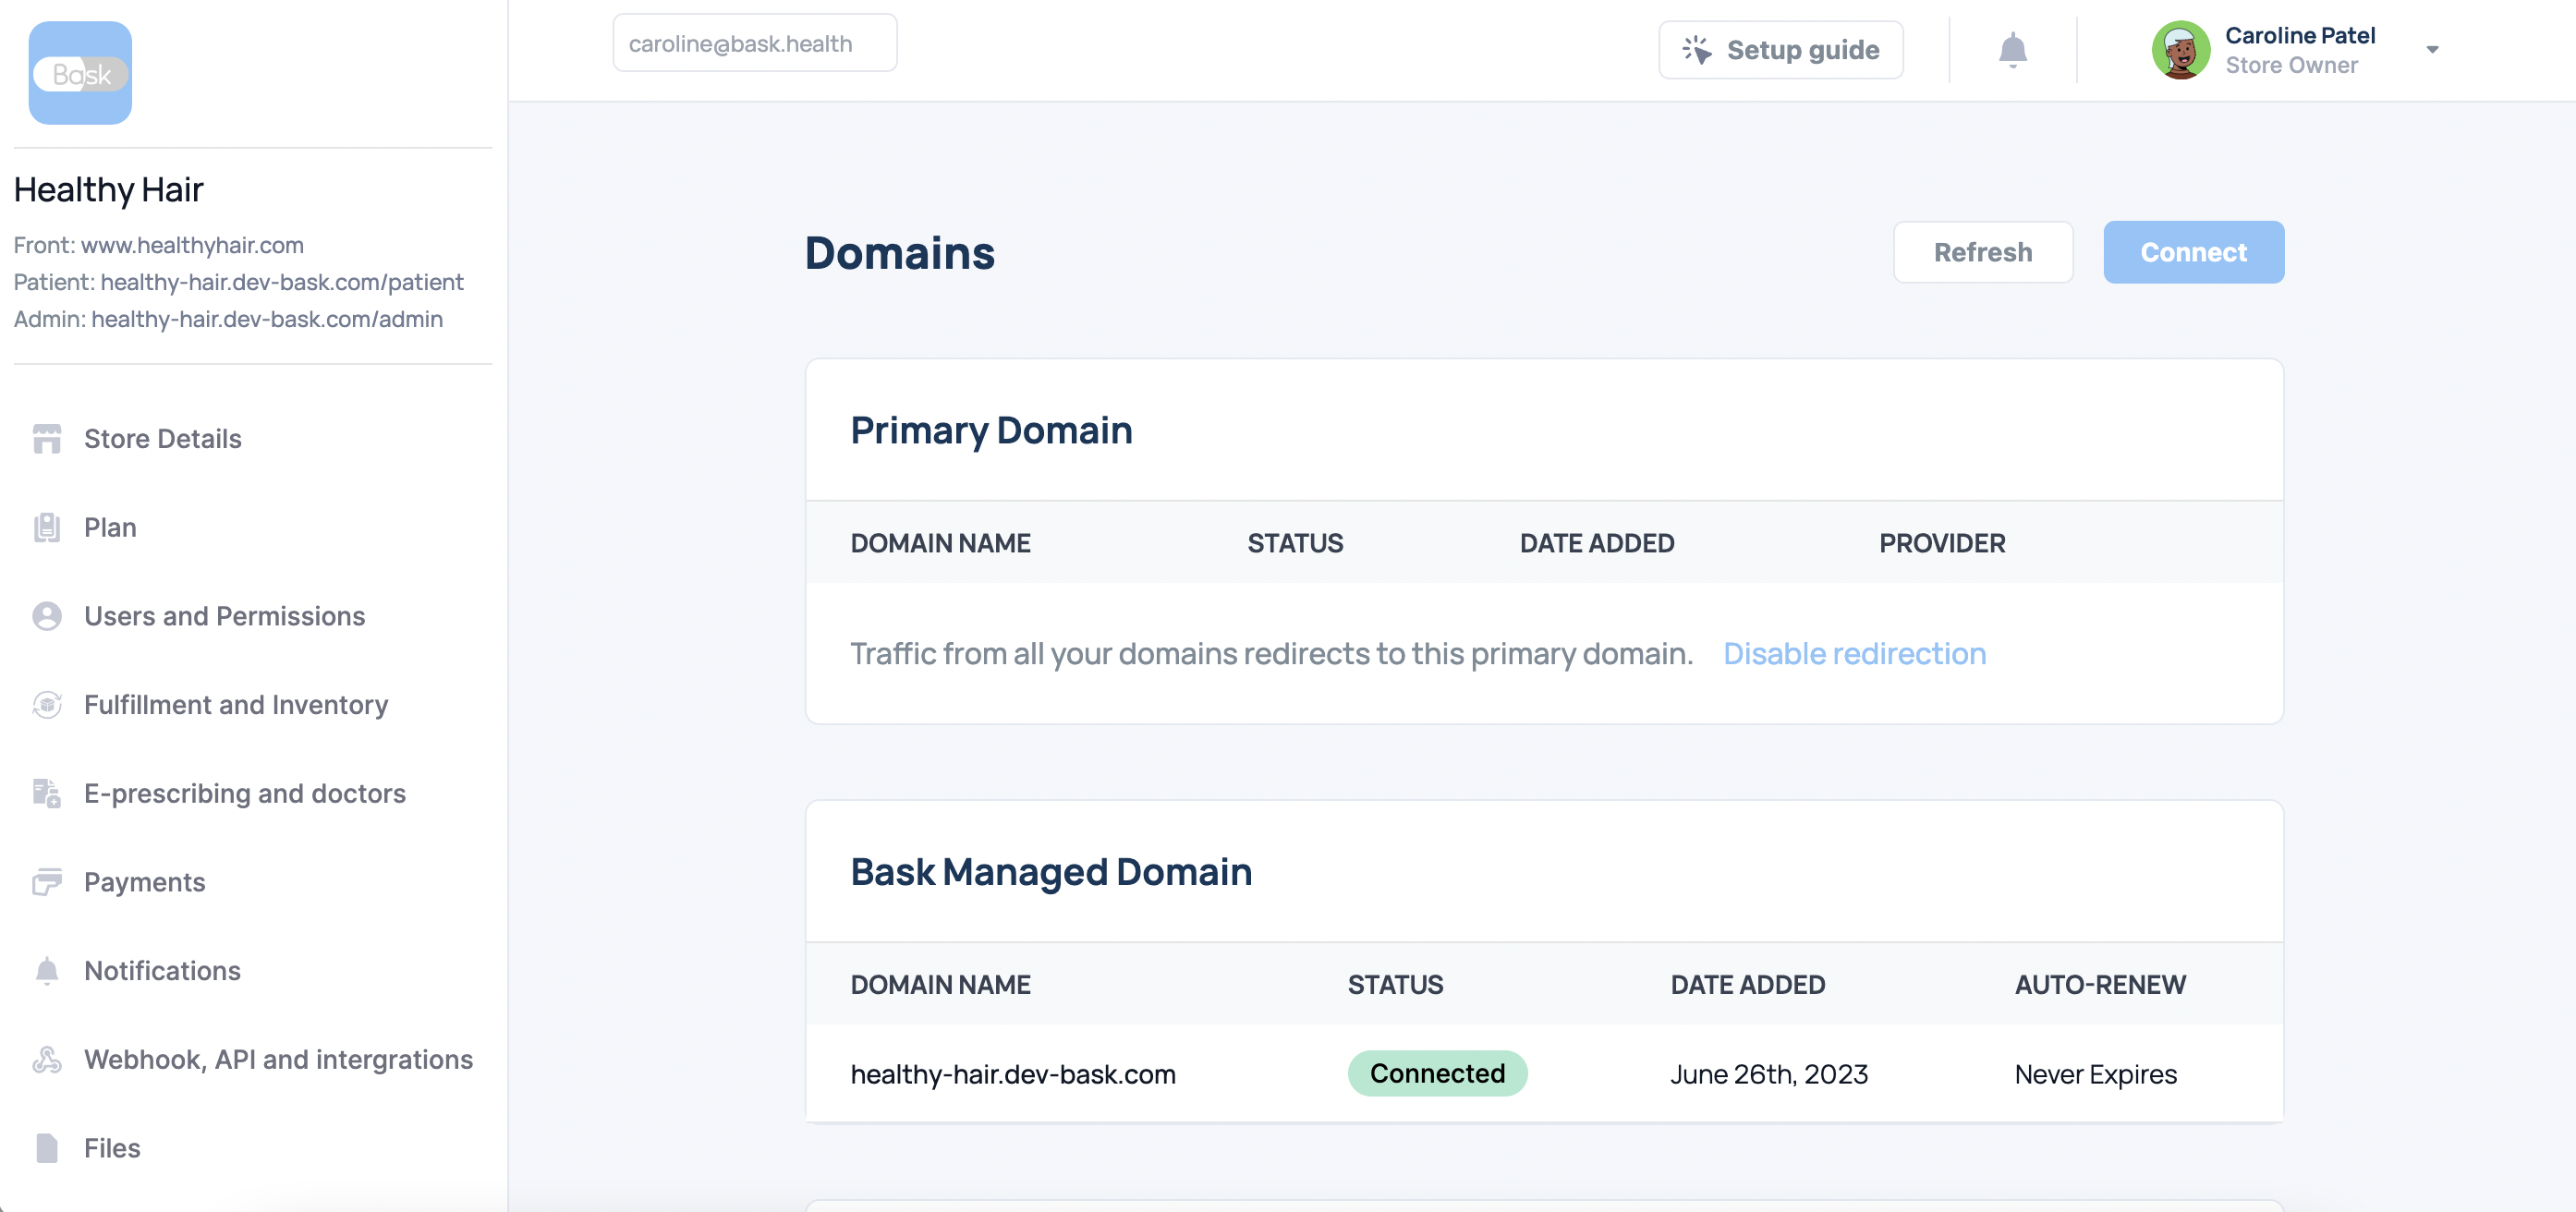
Step 3
To connect to your domain click the "Connect" button. Select the type of domain you would like to add in the drop down menu and type your domain into the "domain name" field. When typing in your domain be sure to not include the "www (opens in a new tab)."
.78bc232b.png&w=3840&q=75)
.2d08bde2.png&w=3840&q=75)
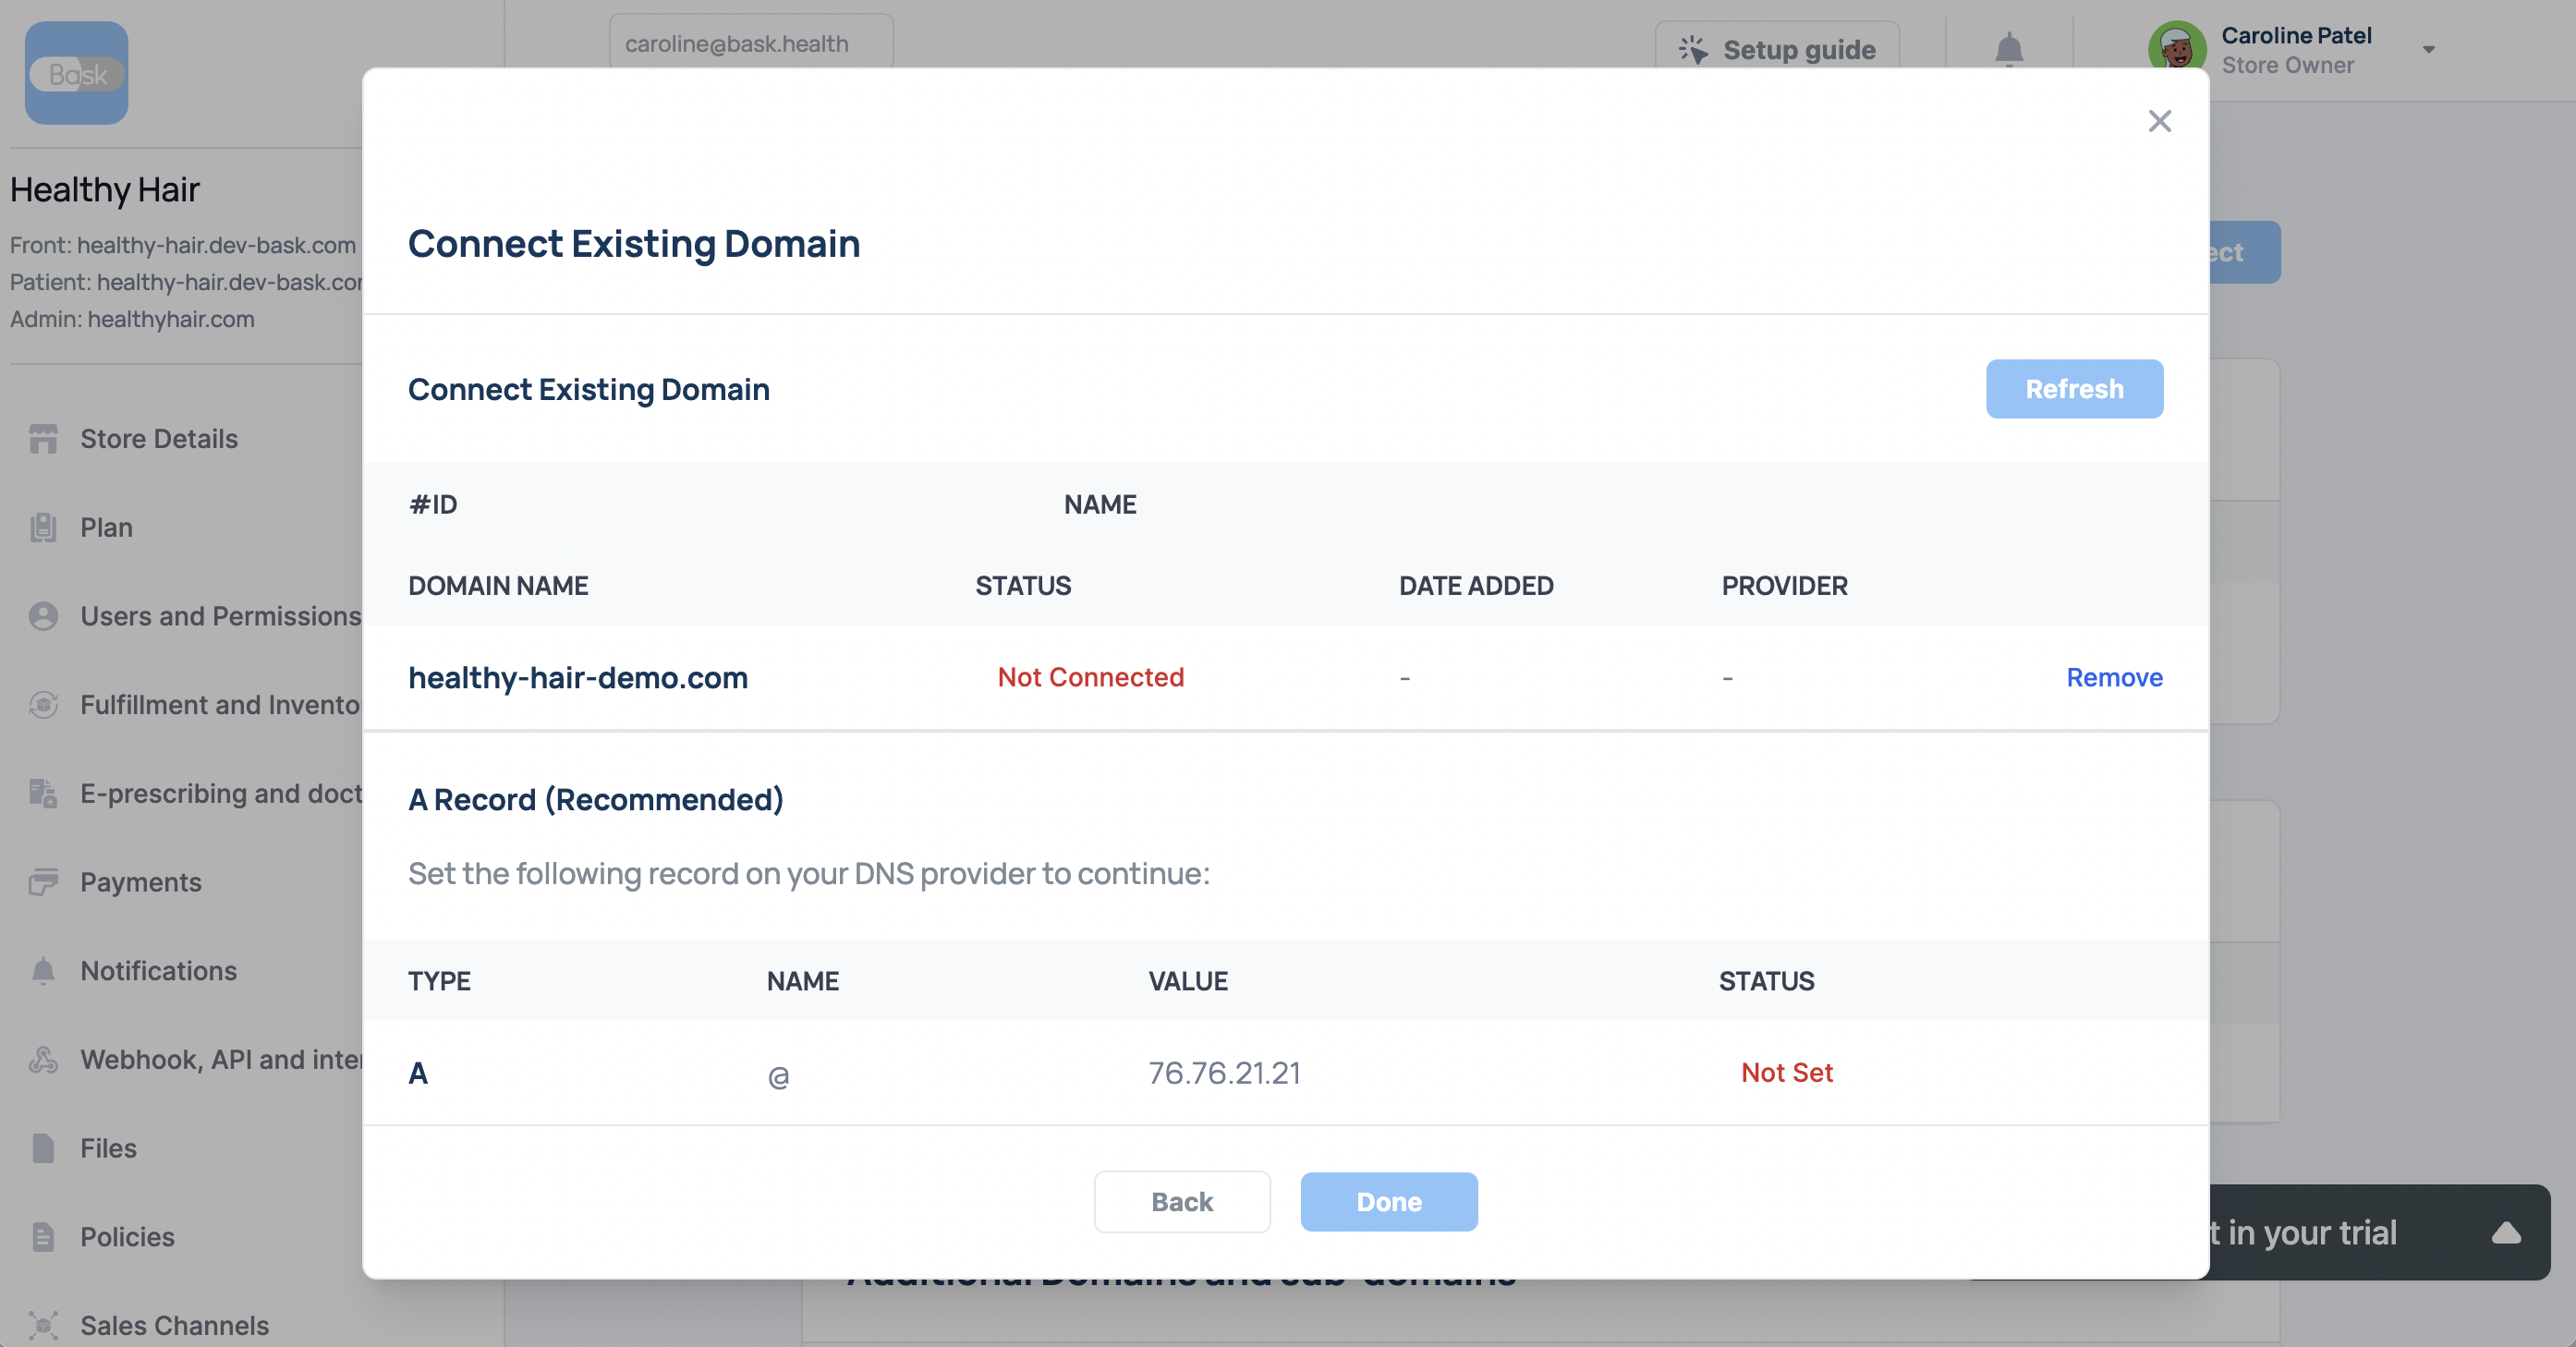
Step 4
Once you have finished entering your info click on the "Next" button and, if necessary, follow the on-screen instruction to set your record with your DNS provider. If your domain is not connecting click "Refresh." Click "Done" to save your changes.
Step 5
To add an additional or sub-domain repeat this process. Begin by clicking the "Connect" button to add an additional domain.
.2e3aadf7.png&w=3840&q=75)
Step 6
In the "Domain Type" drop down select the type of domain you would like to add. If you would like to add a domain for the admin portal select "Admin Portal." Enter your domain name into the field. Be sure to include a subdomain as a prefix such as "Admin." Click "Next" to finish adding your new domain.
.151888cf.png&w=3840&q=75)
Step 7
Once your domain has connected click the "Done" button to save your changes.
.43599018.png&w=3840&q=75)
Step 8
When your domain is connected, you will see "Connected," highlighted in green under the status section to indicate that your domain is ready to go. Repeat this process as necessary to add more domains or edit any existing ones.
.6d556b35.png&w=3840&q=75)