Branding
How do you add your logo and branding to the patient portal?
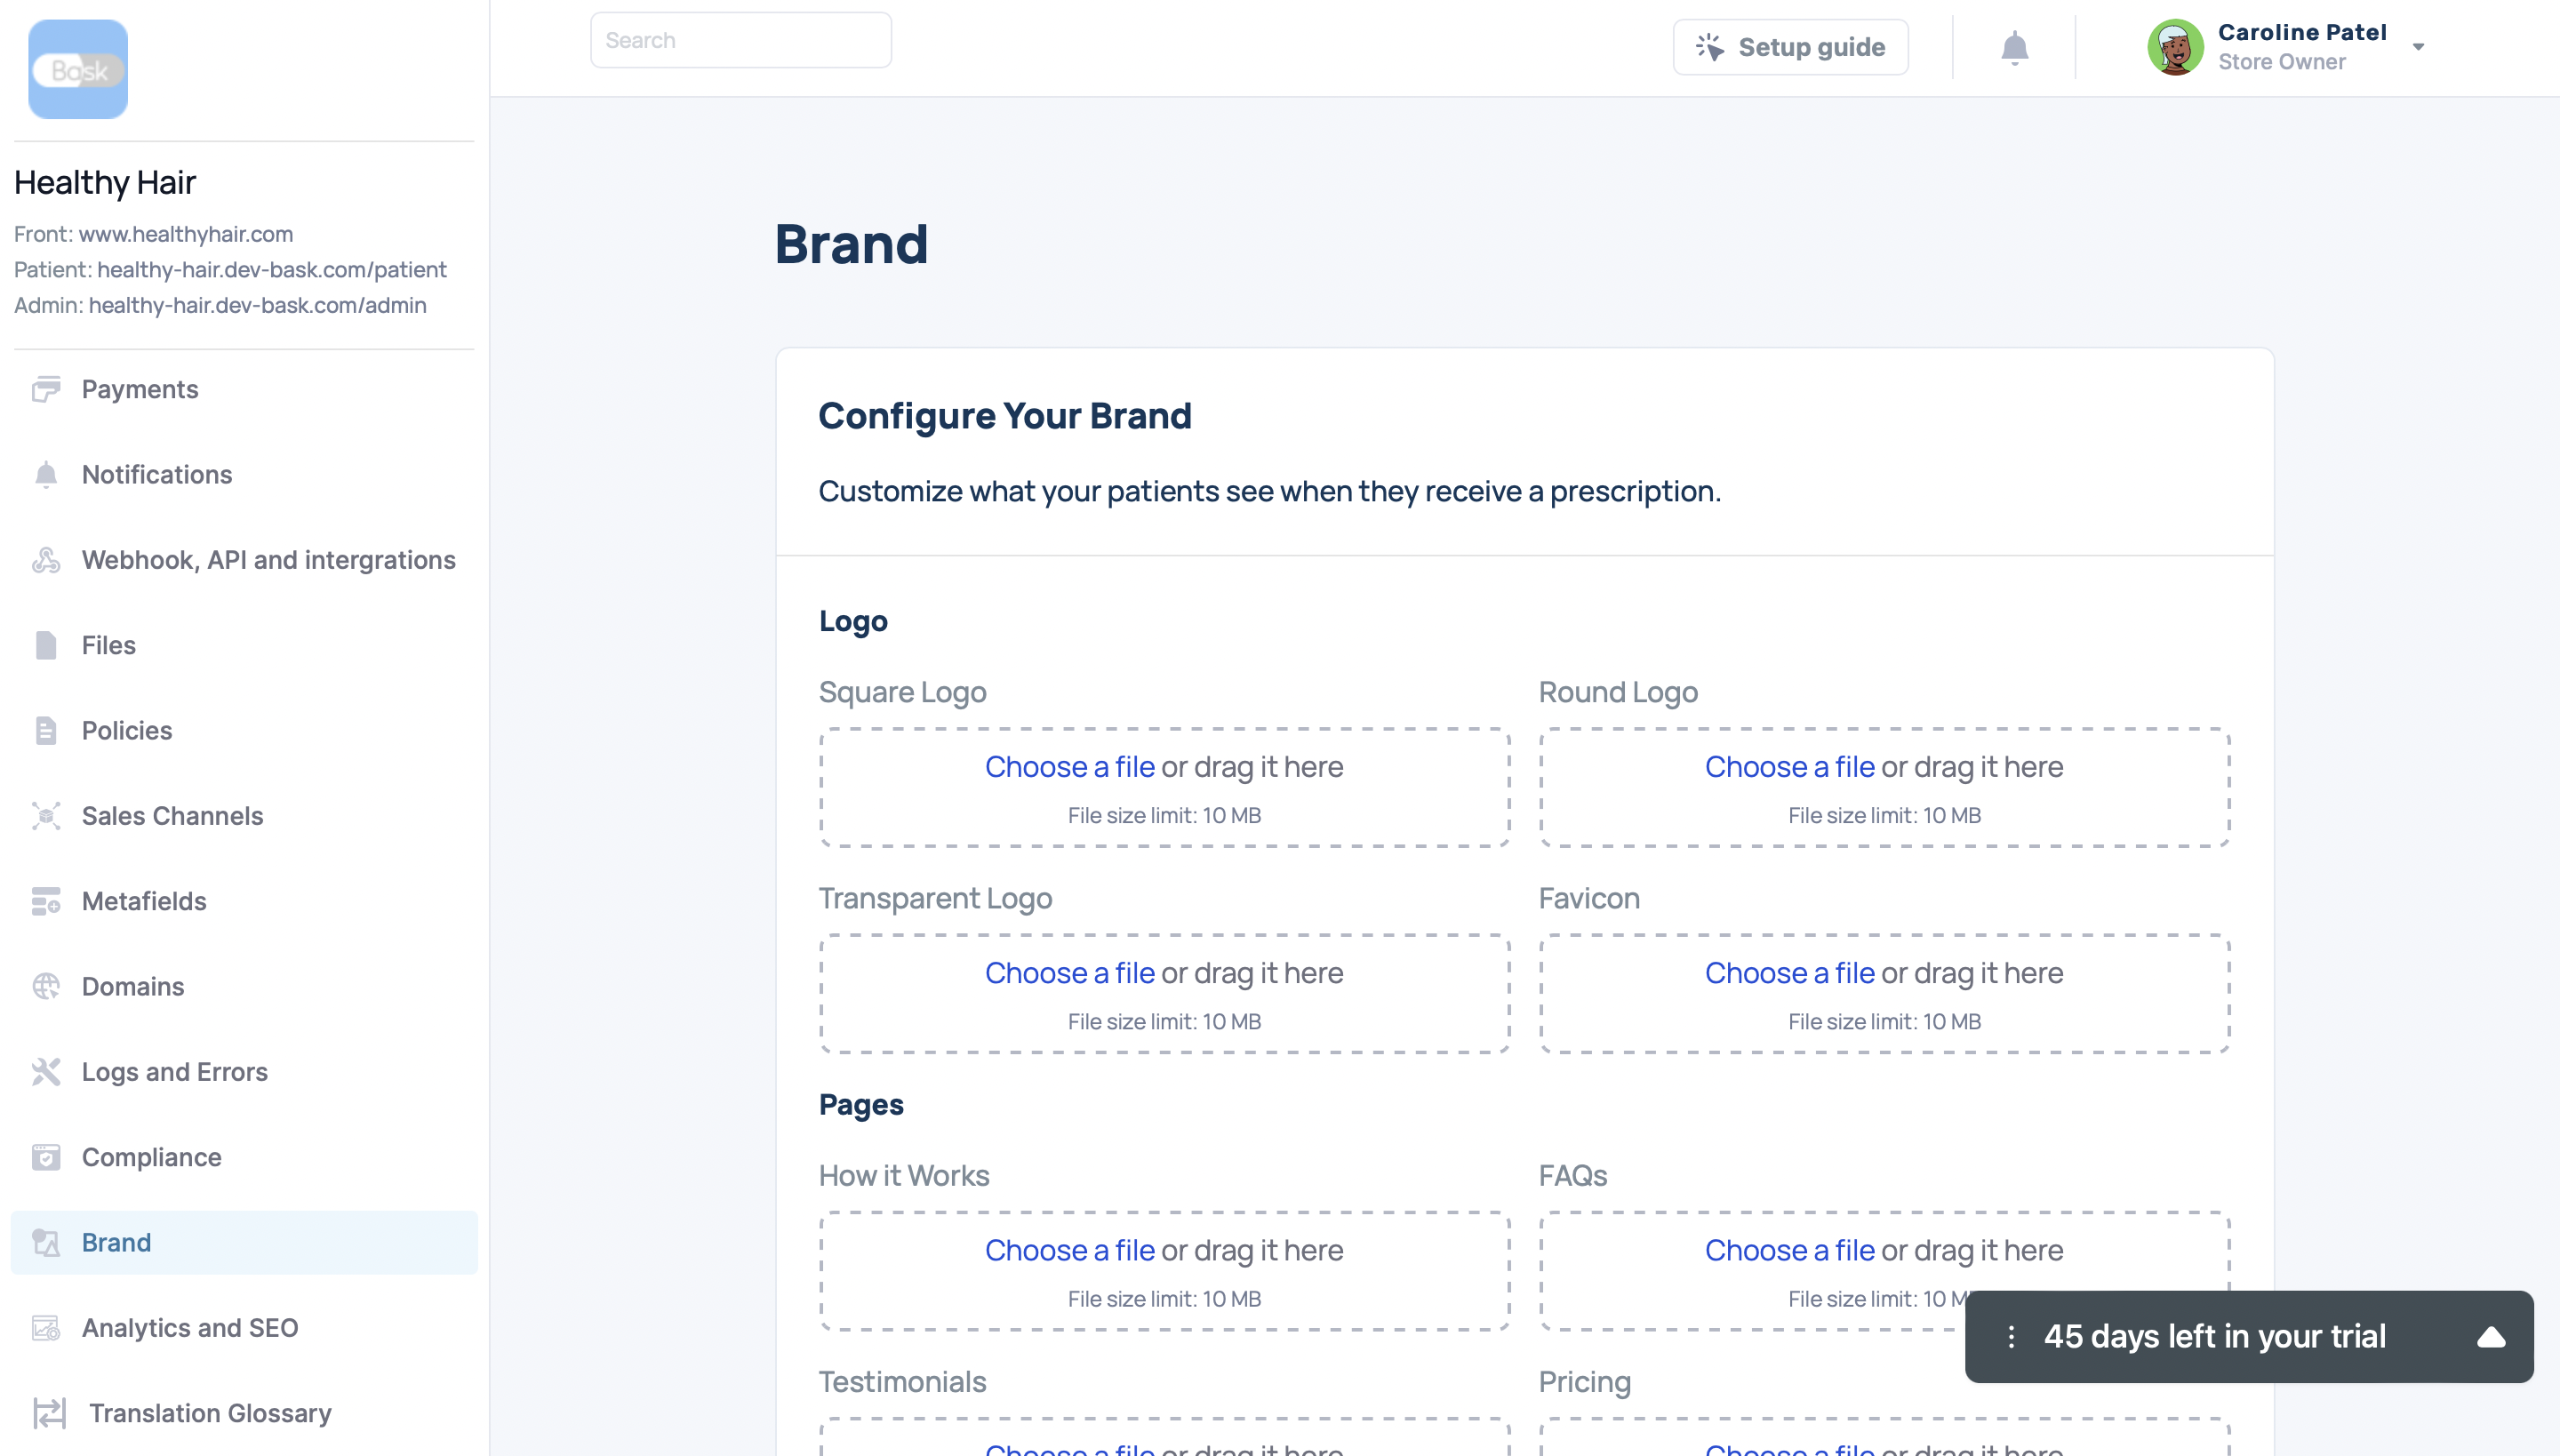
Step 1
From the main dashboard navigate to the settings page. From the settings page head to the brand page. This where you can customize the look of your platform by adding your logo and changing the default colors to better match your brand.
Step 2
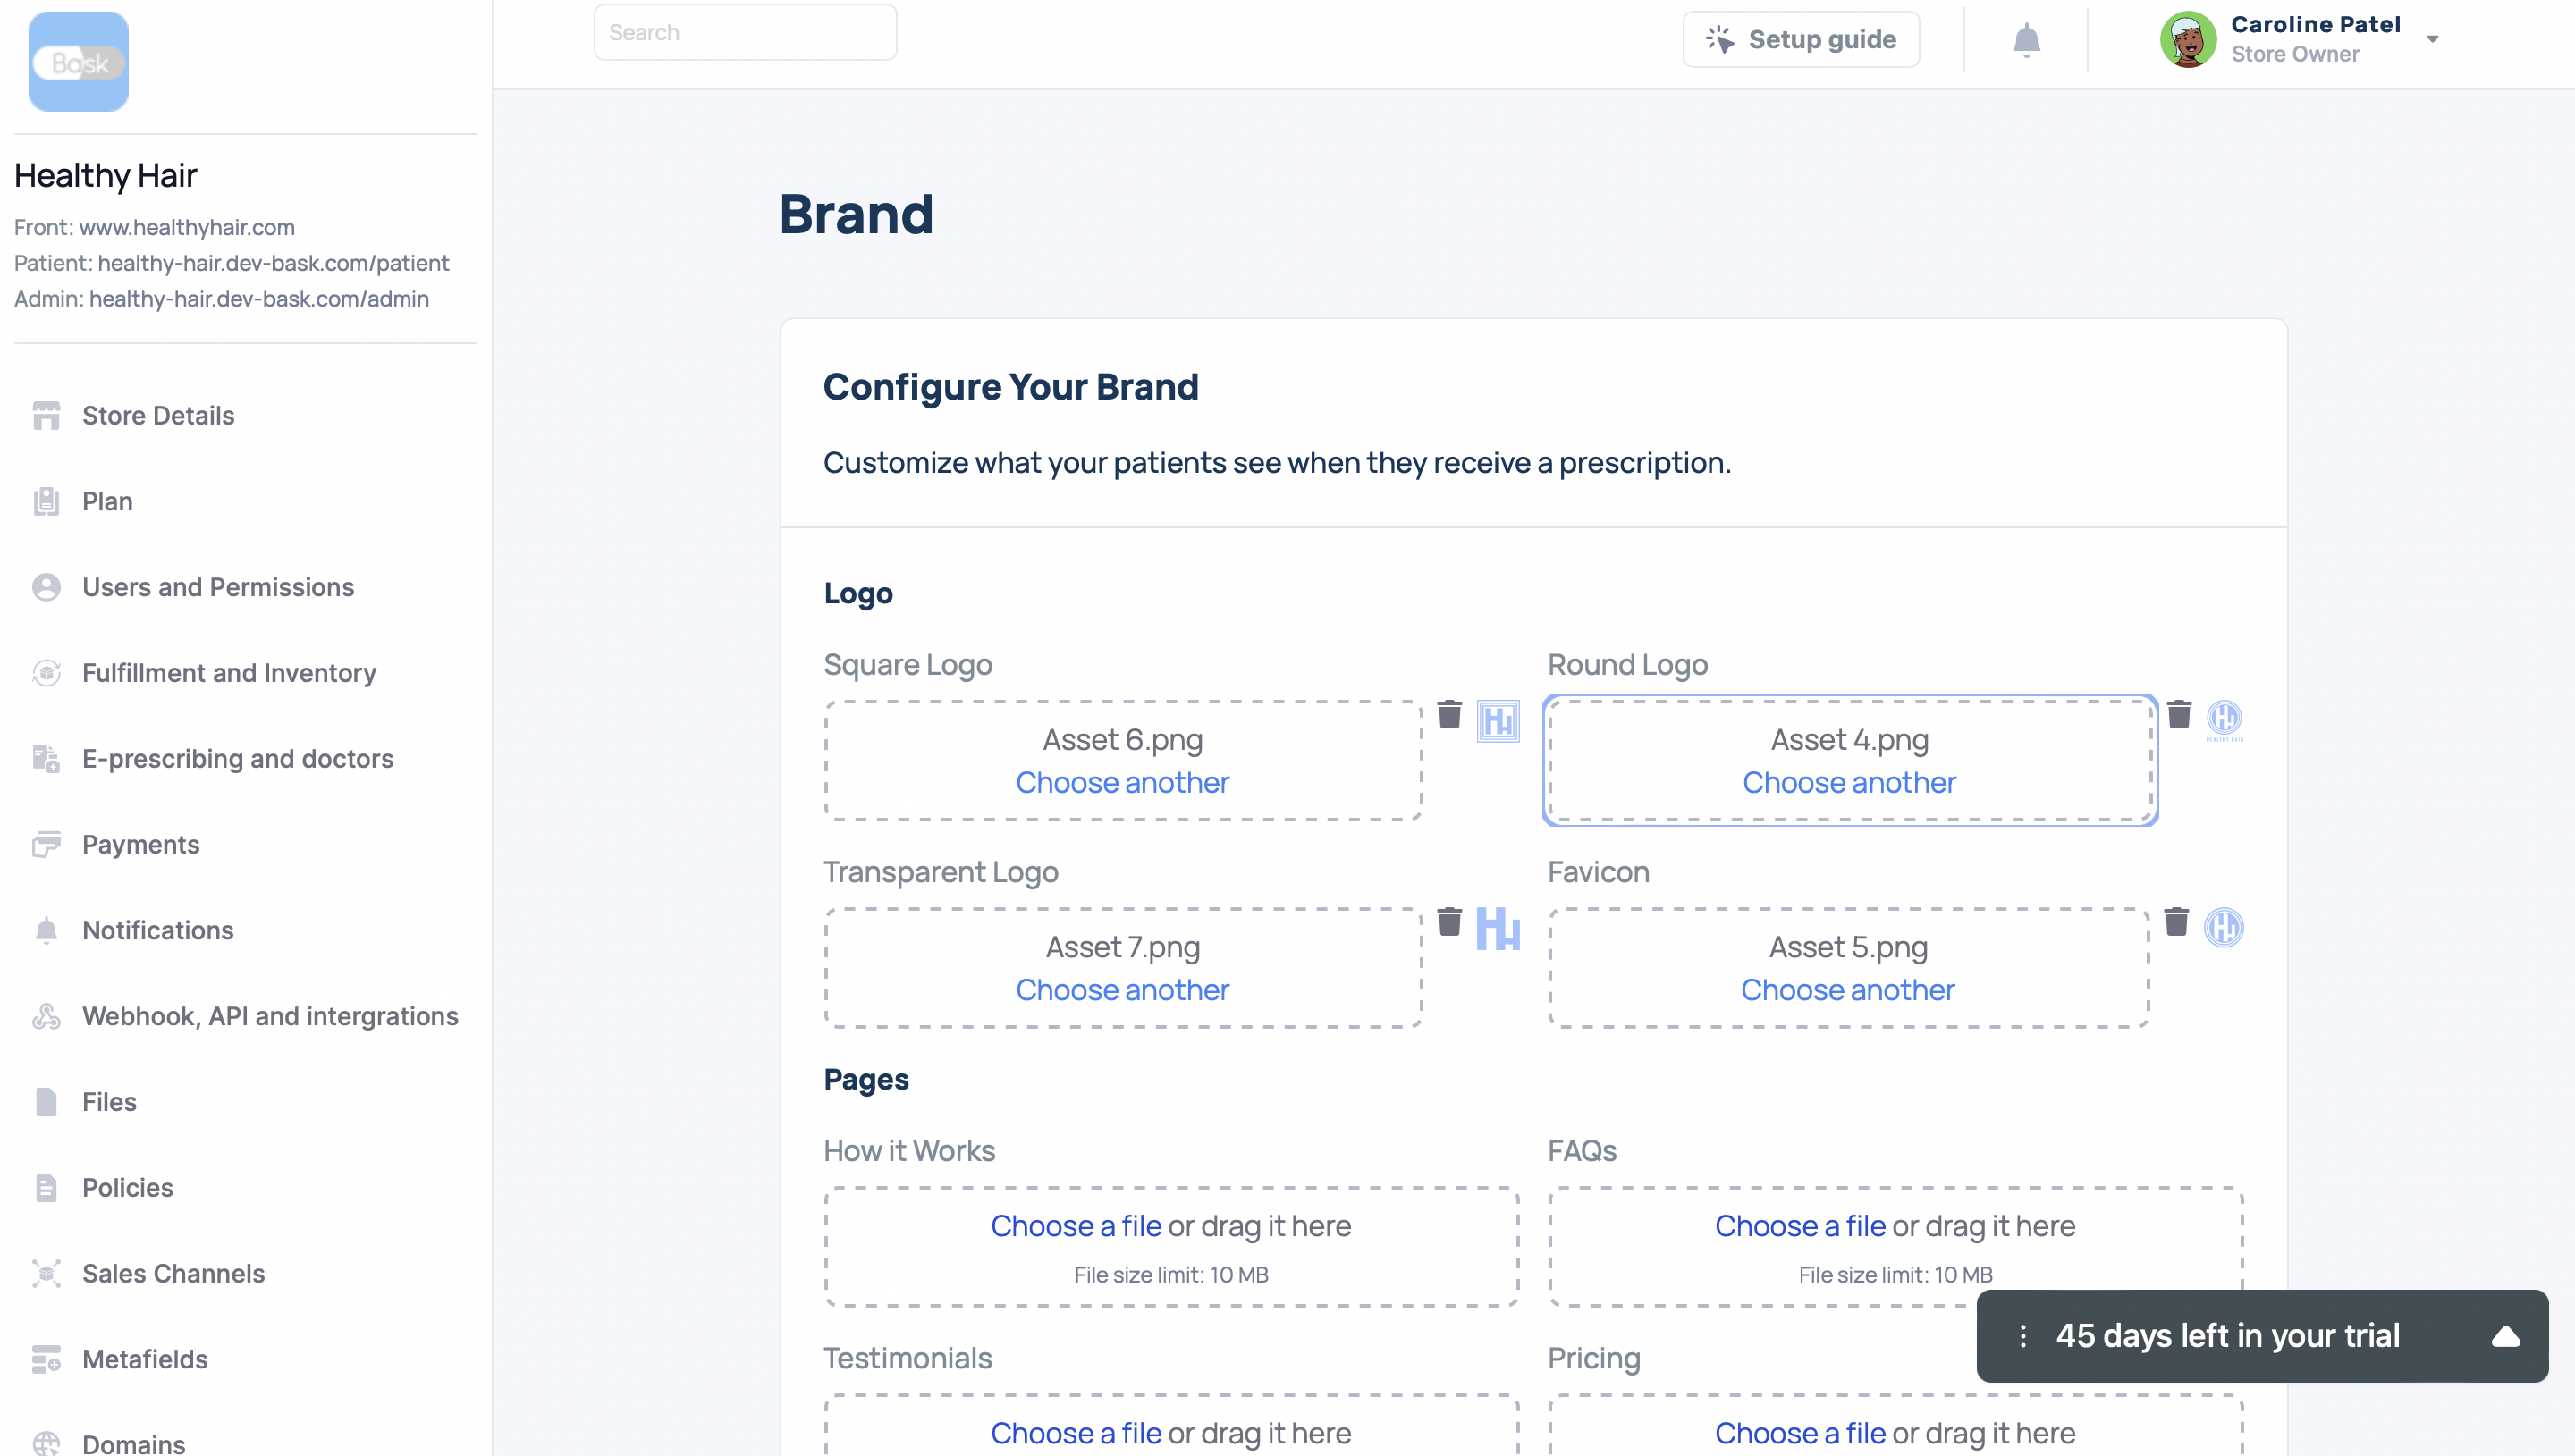
Before adding your logos, make sure they are saved to your files as pngs and are under 10 MB each. There are two options for importing your logos. The first way is to press on the "choose a file" link in each logo box and upload your logo as a file.

Step 3
The other option is simply dragging your logo from your files into each dedicated dropbox.
![]()
Step 4
Once you have dragged your four logo variations into their appropriate places, they should be visible to the right of each box (as pictured below.)
Step 5
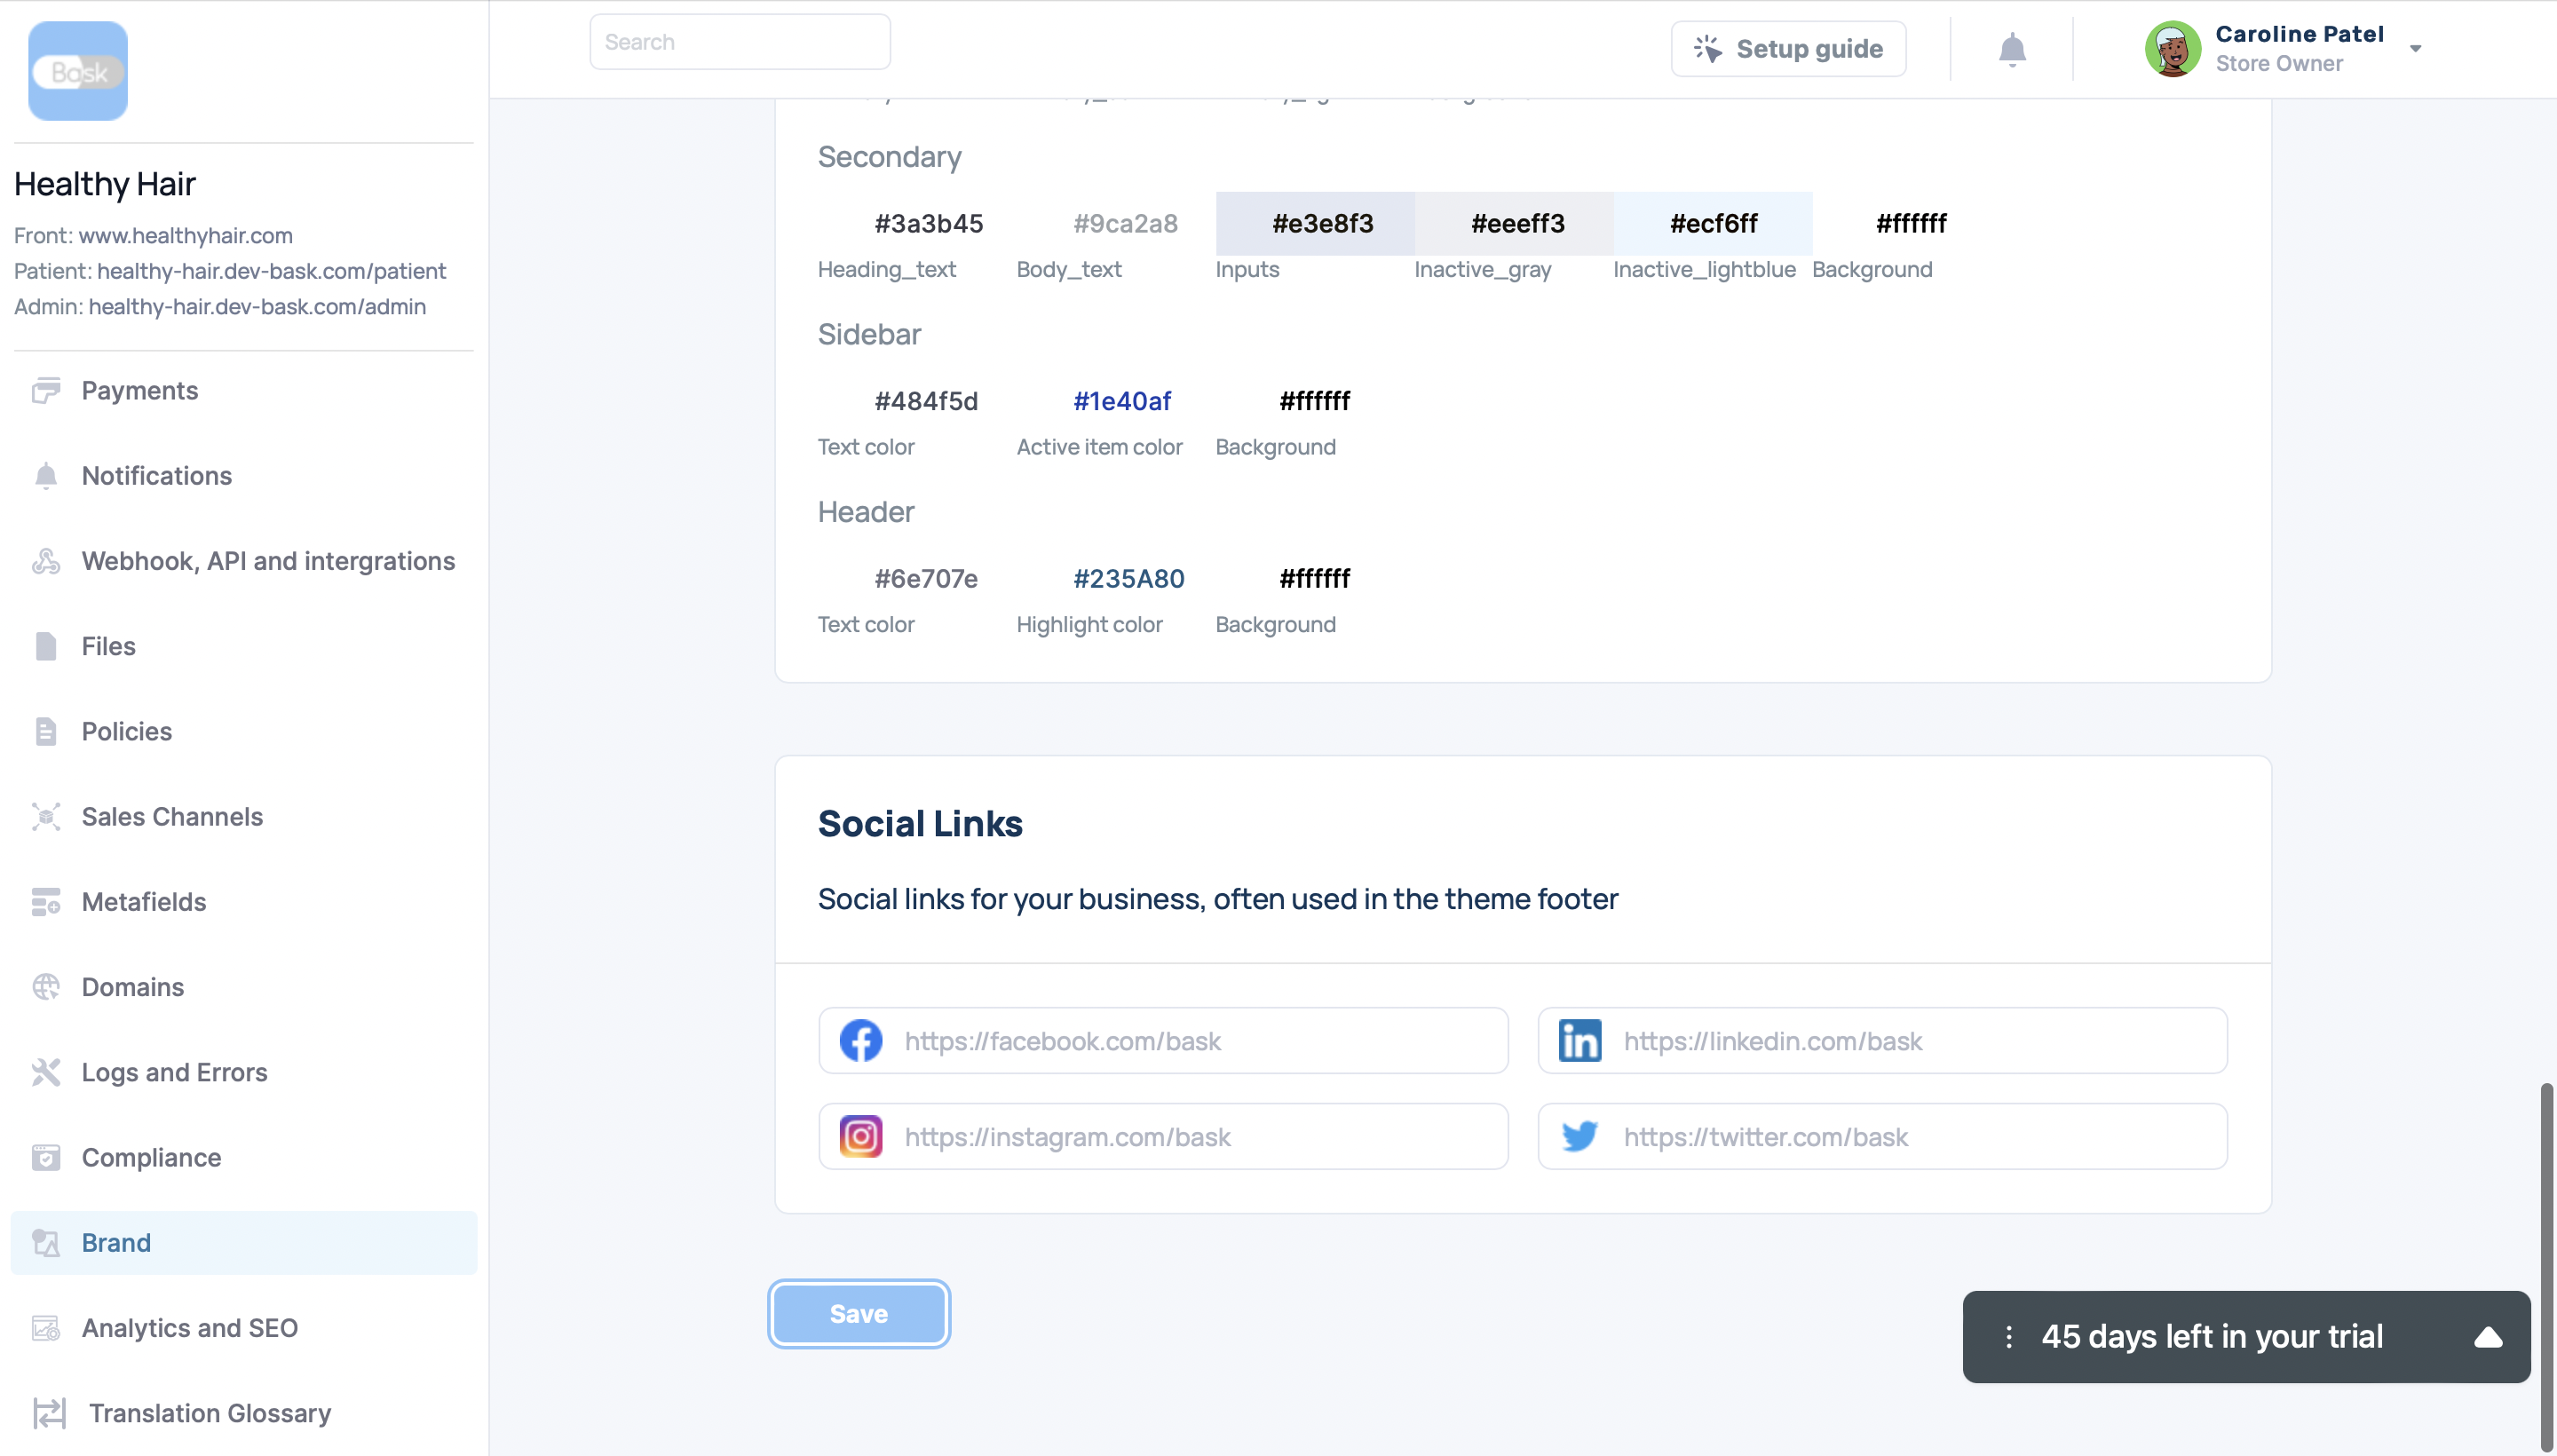
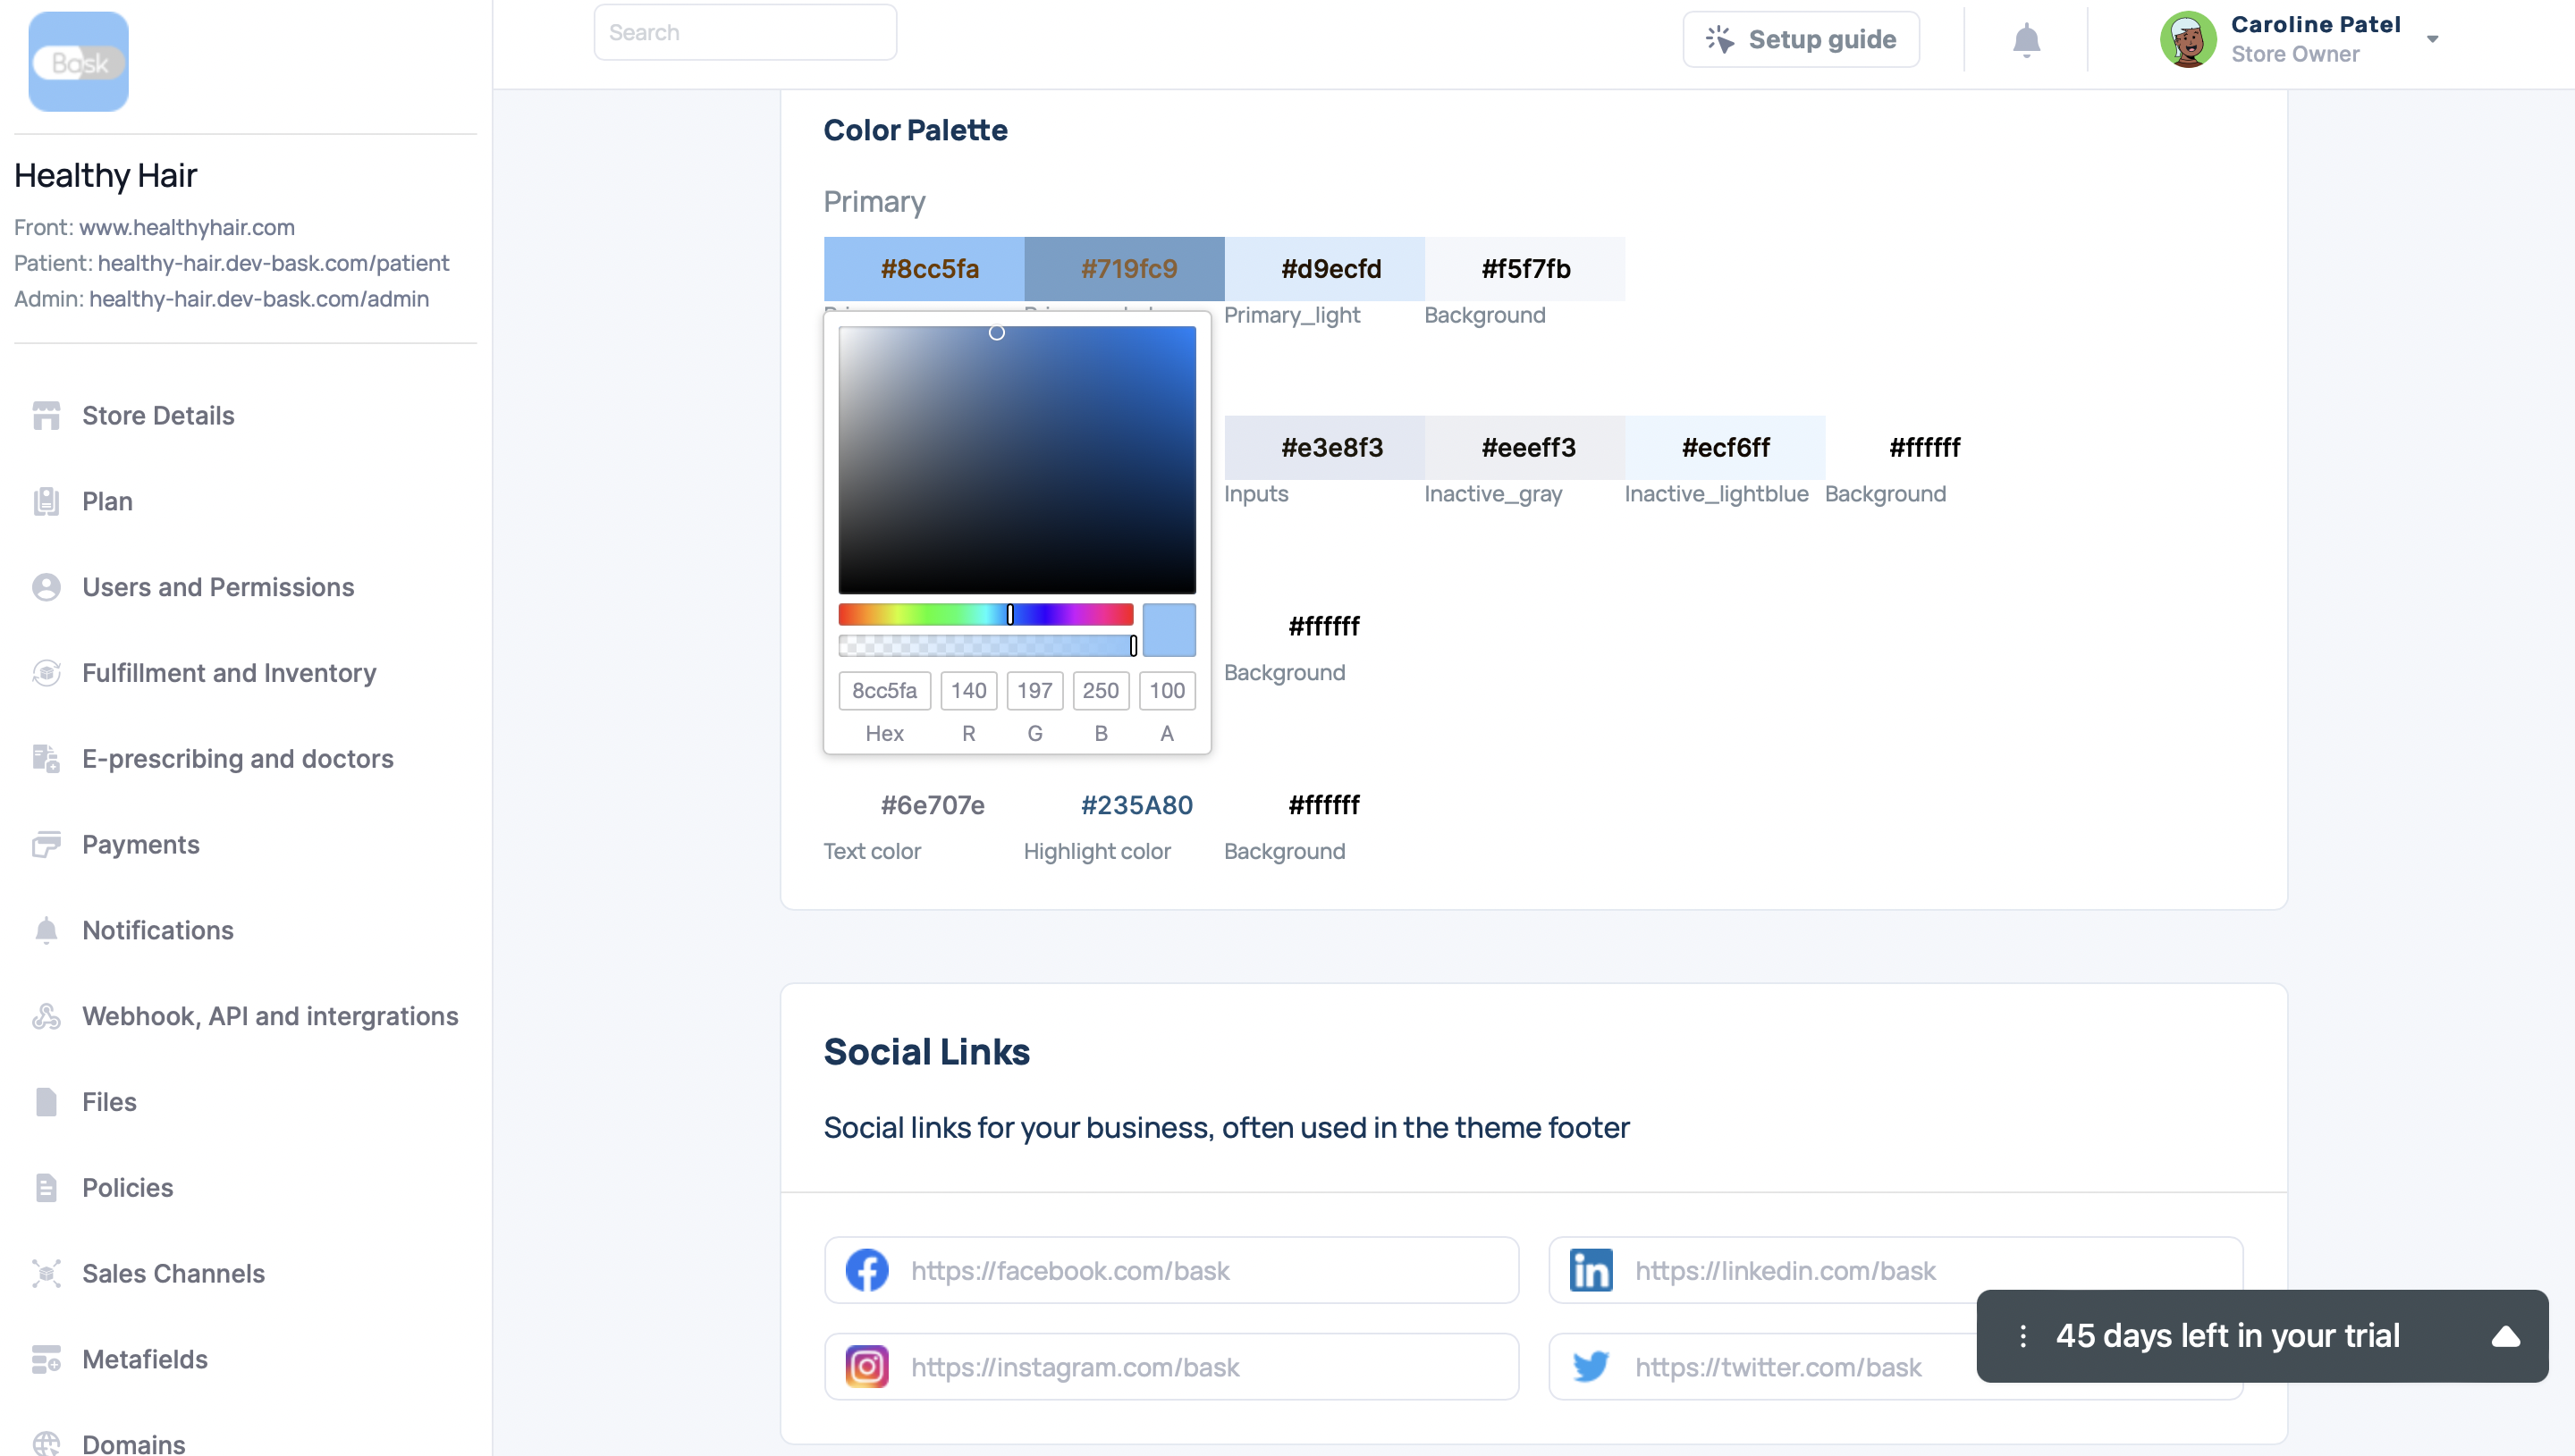
To change the colors visible on your platform scroll further down the brand page until you see a section labeled color palette.
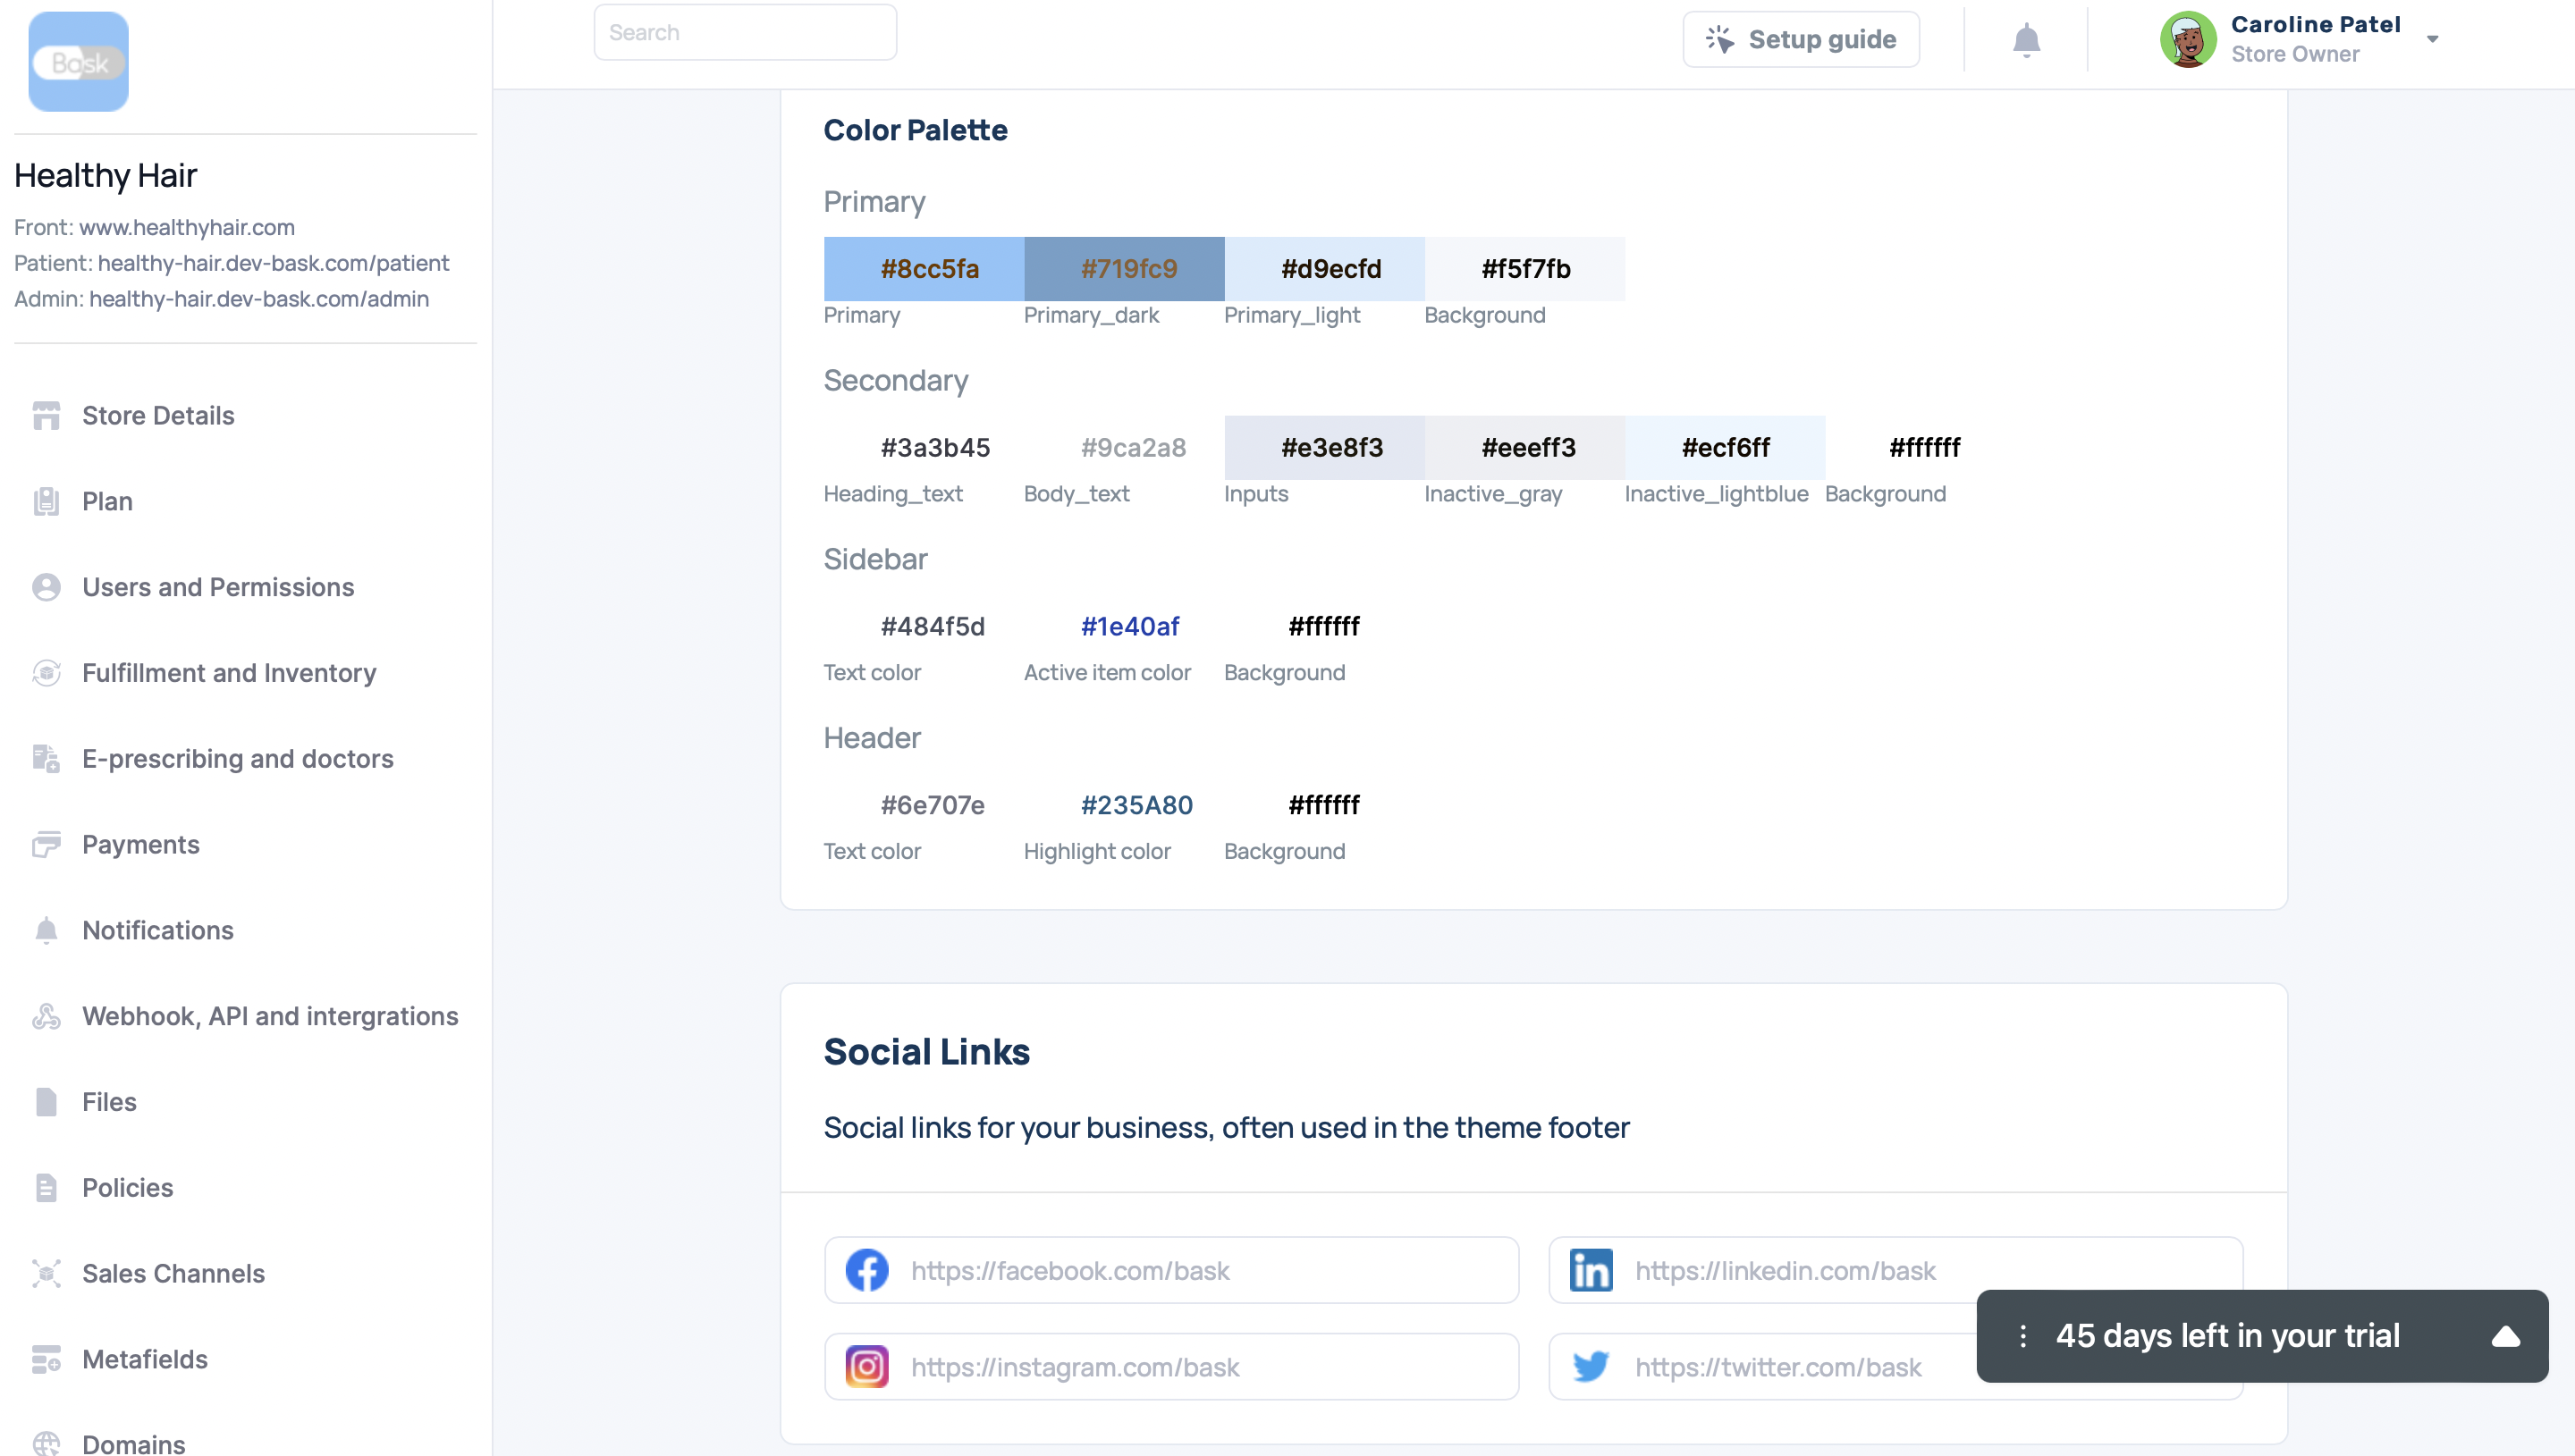
Step 6
To modify the color, simply click on each color you wish to change. You have several options for selecting your desired color. You can create a new custom color by dragging the color picker through the color wheel, or enter the Hex or RGBA values to easily obtain the exact match you are looking for.
Step 7
Lastly, ensure that you scroll down to the bottom of the page and hit the save button to upload your updates.