Setting Up Your Store
Let's get started with setting up your store. As at this stage you are already logged in, you can start by clicking on the Setup Guide button on the header or Finish Setup/Setup Guide on the dashboard.
Following are the steps you need to follow to set up your store:
At this point you should have already finished the onboarding process details and all those sections being filled in onboarding will get reflected here in green. If not you can always fill those sections in Finish Setup section as well.
Product details
Here you can add the details of the products that you want to sell on your store. You can add the product name, description, price, and the image of the product. You can add multiple products and variants as per your requirement.
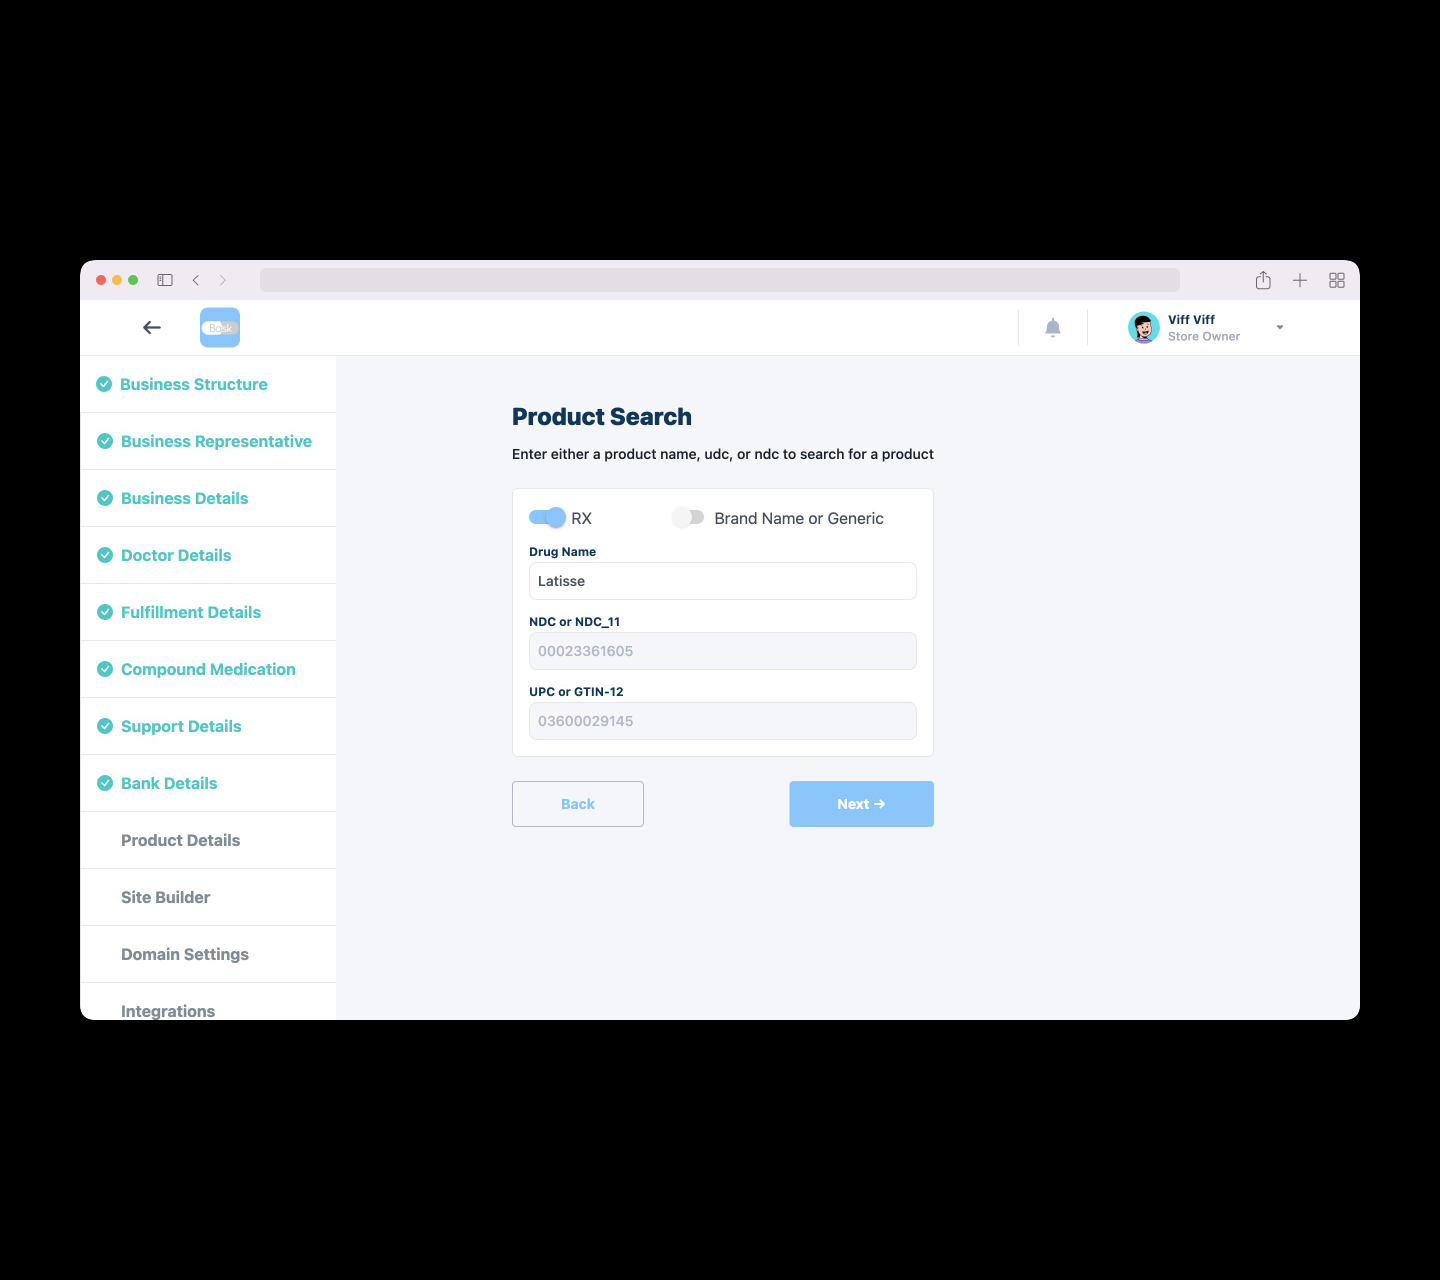
You just have to type the product name or NDC or UPC and the product details will be suggested for you to pick, once picked, the rest of the details will be automatically filled in along with product label information. You can also add the image of the product by clicking on the Image field. You can also add the variants of the product by clicking on the Add Variant button. You can also add the price of the product and the variants along with few more details.
Let's take one example, let's say product name is Latisse. Fill Latisse in the product name field and the product details will be suggested for me to pick.
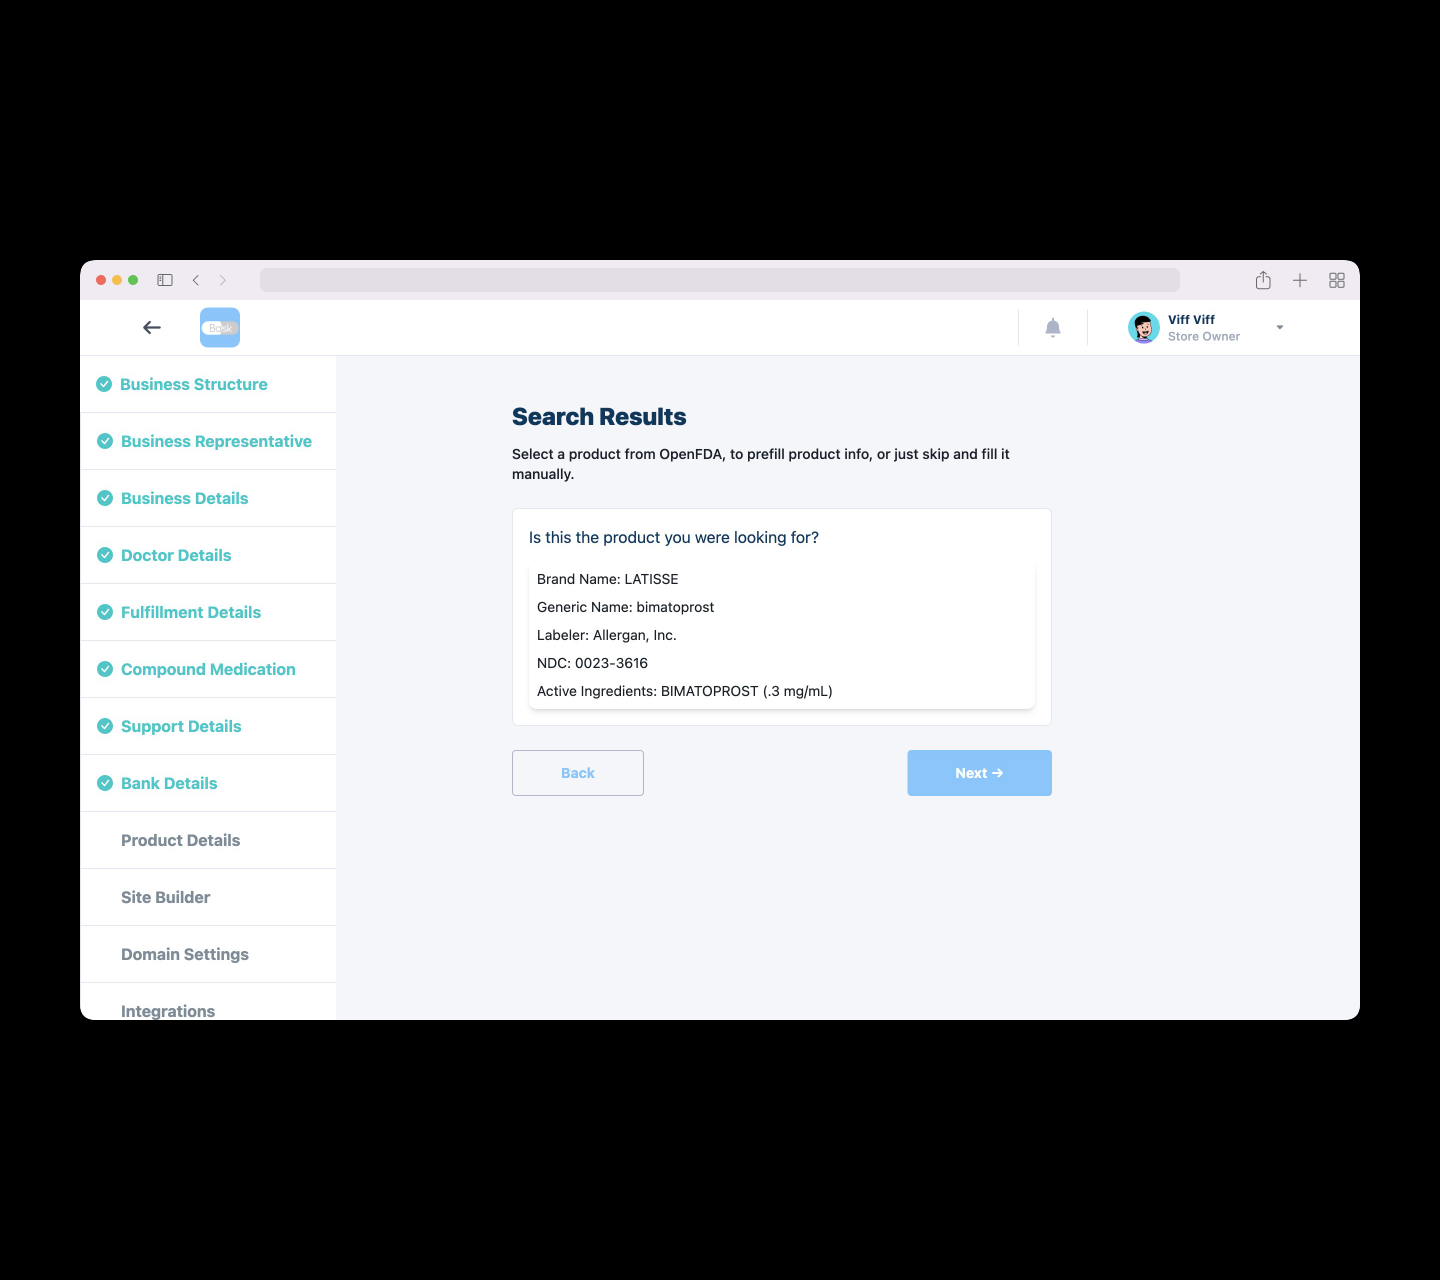
Select the product as required from the suggested search results.
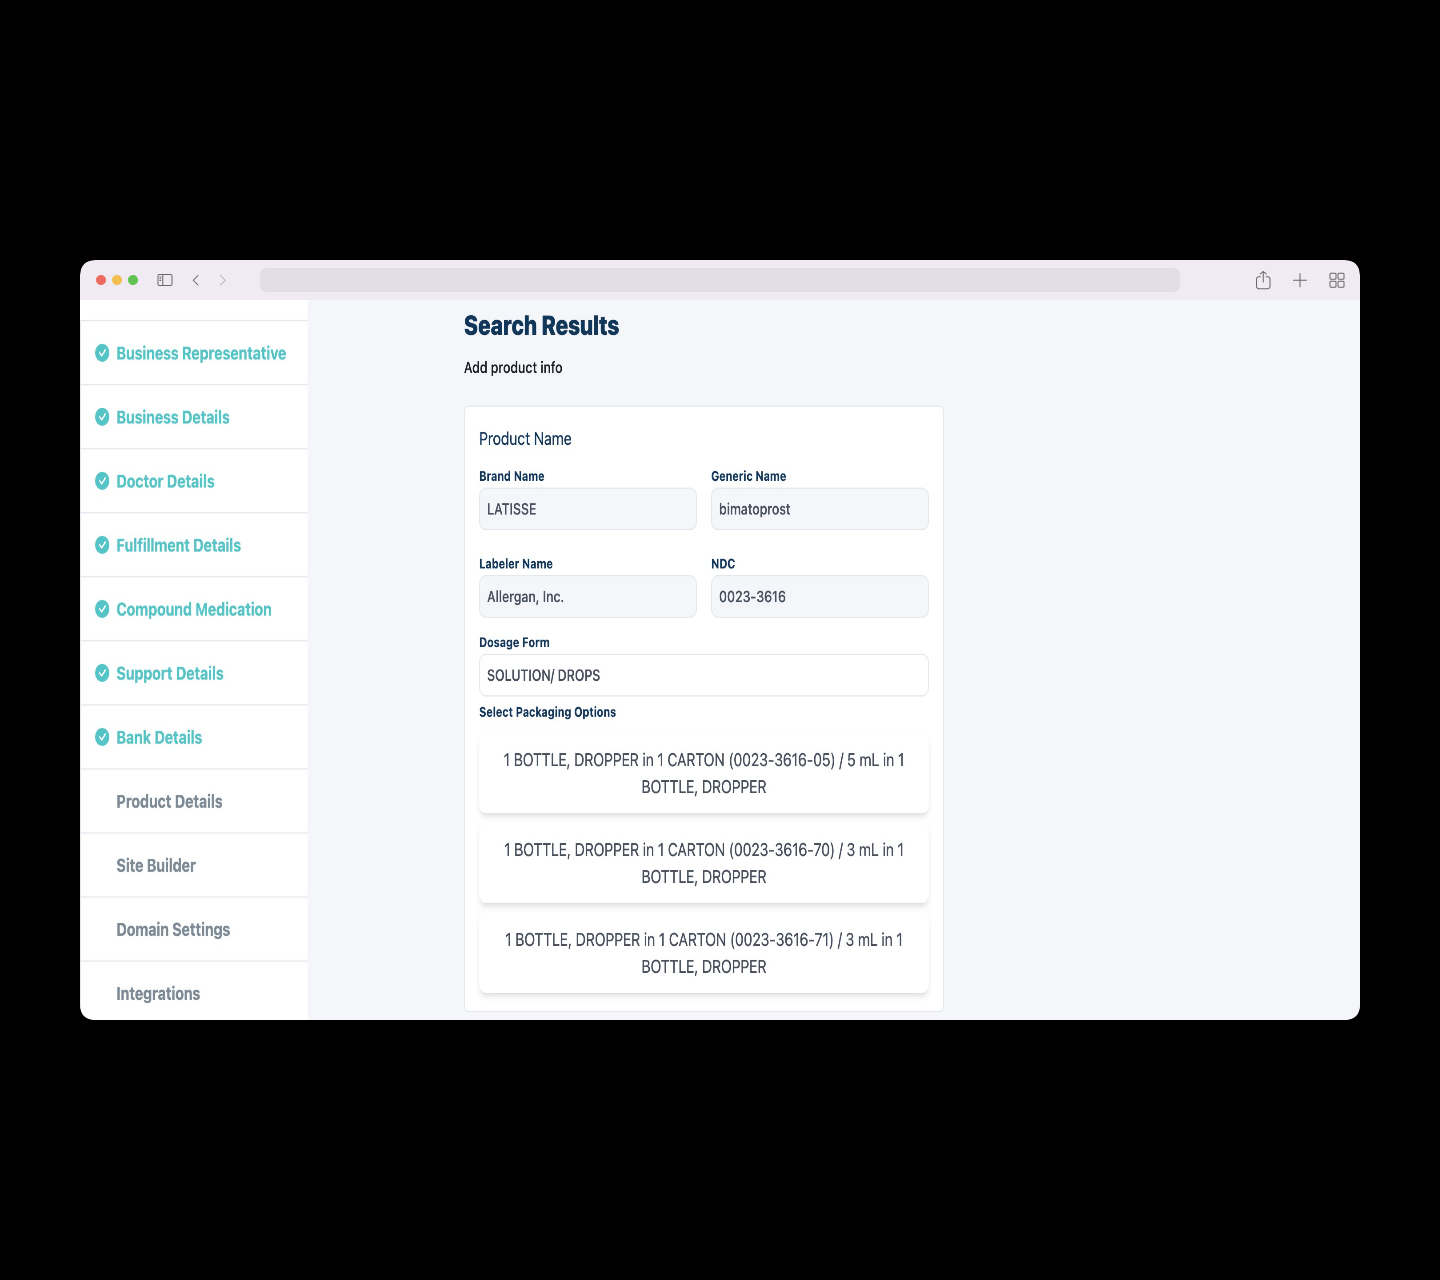
The rest of the details will be automatically filled in. Here there is also the functionality to select the packaging options(variants) by clicking on it.
Then next step will show all the label details of that product in details.
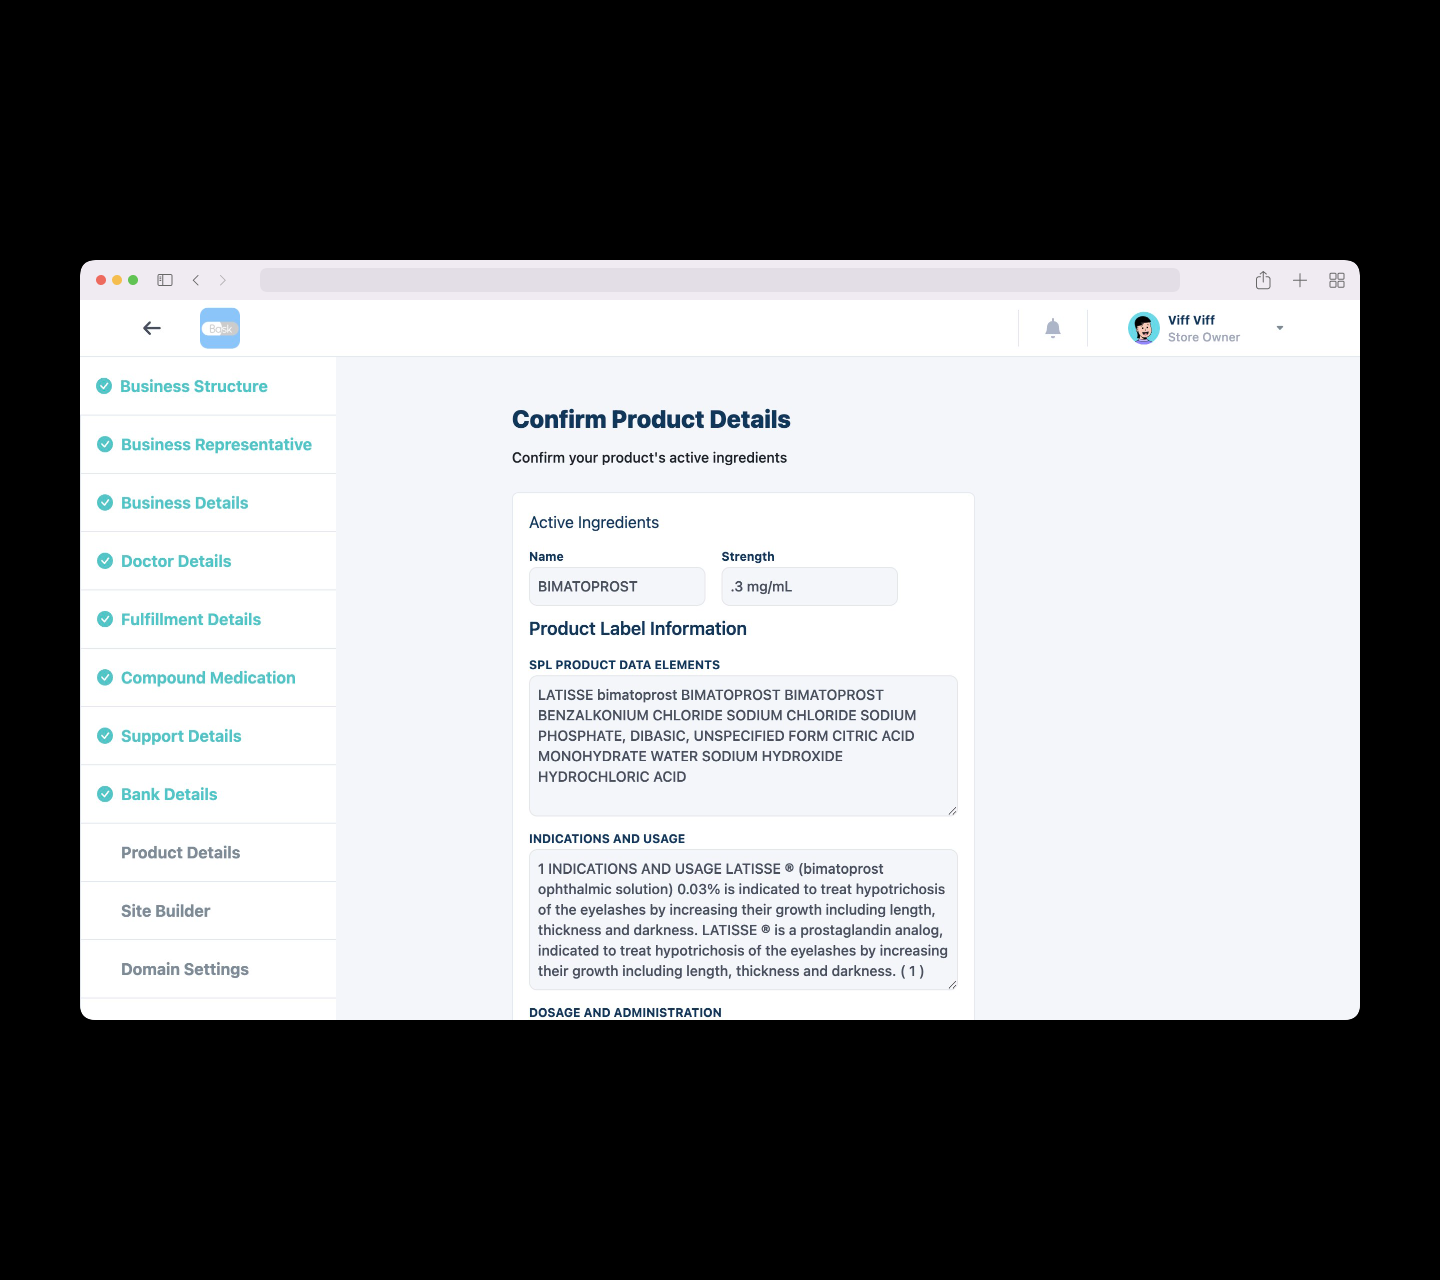
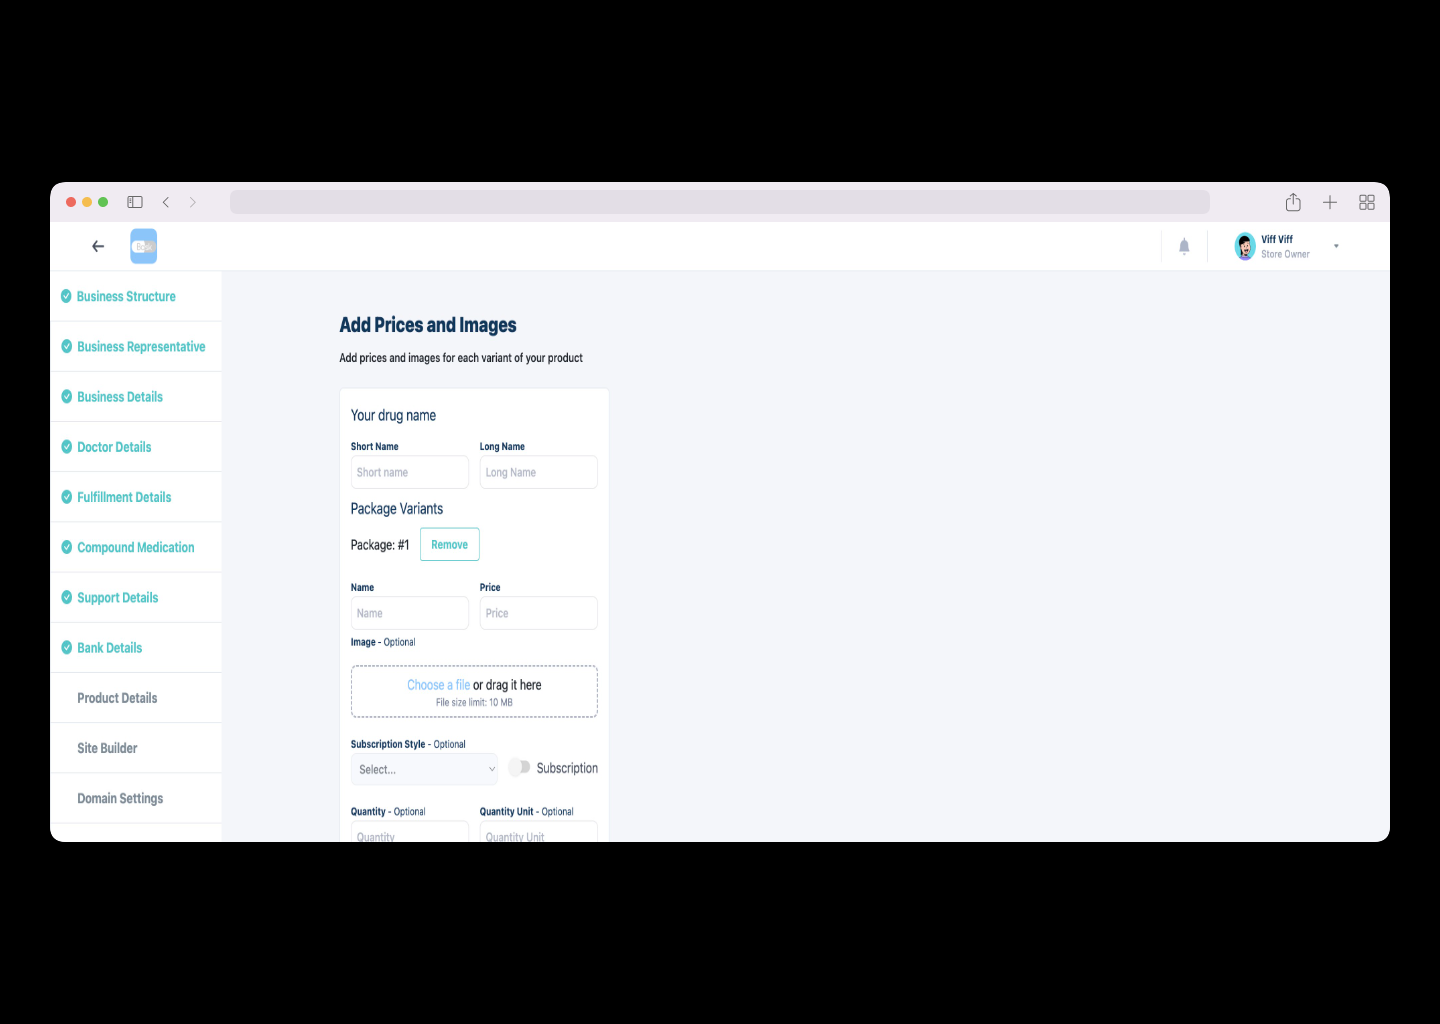
Here you can add the name of the product, images for all the packaging variant options. Also there is the option to add more variant button.
Site Builder
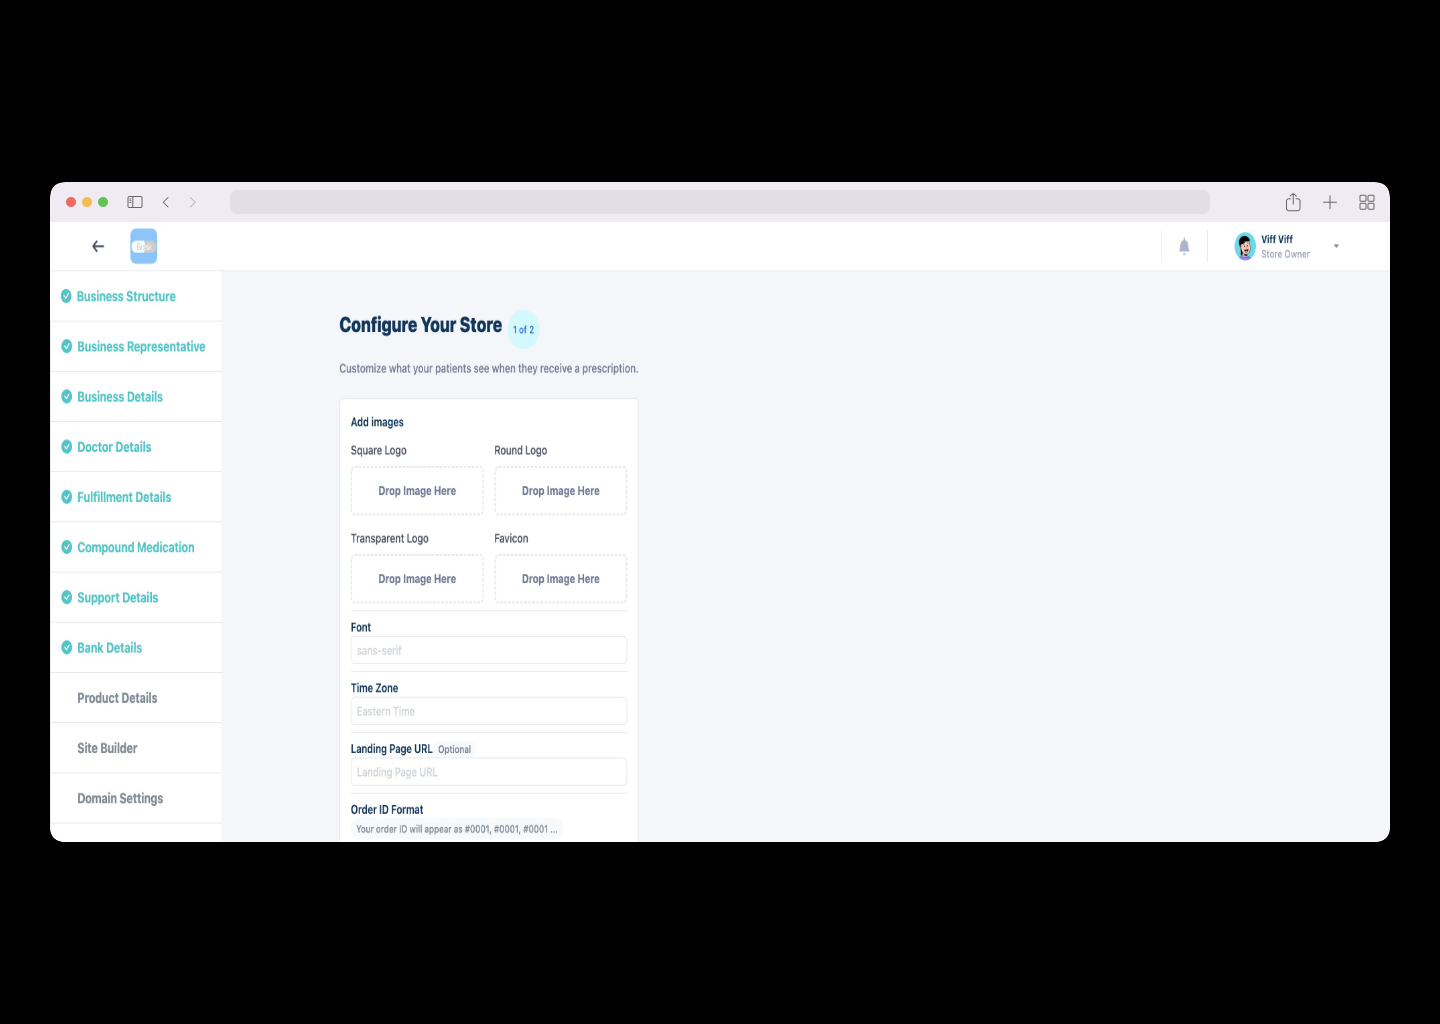
Using the site builder you can configure your store according to your brand, customize what your patients see when they get enrolled and how they interact with your store. You can add logos, favicon, and other images. Also, the content for policies and terms and conditions for your store can be added here. You can also customize the color scheme of your store.
Here in the Add images section you can add the logos and the favicon for your store, also the order id format and landing page URL can be set from here. Also, the policies content can be added here.
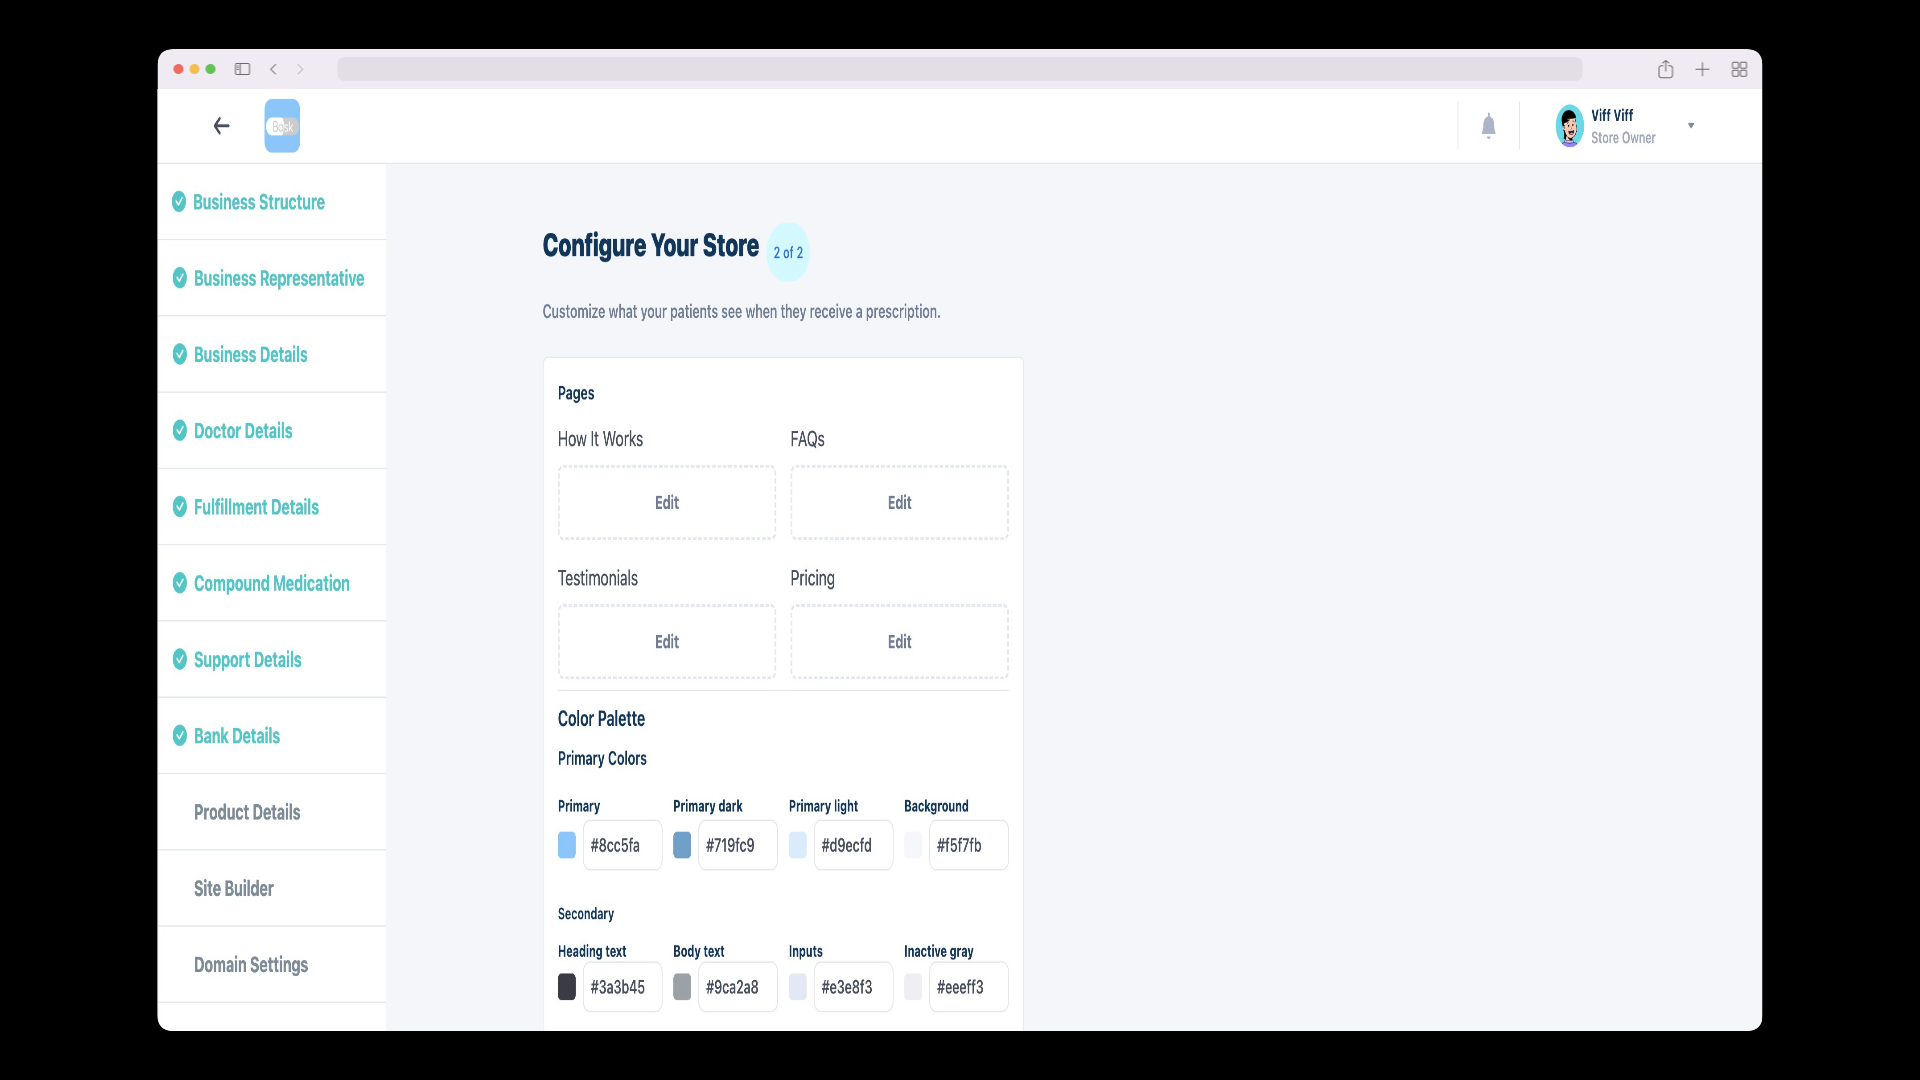
On this page you can customize the color scheme of your store. You can also add the content for pages like How it Works, FAQs, Pricings and Testimonials of your store.
Domain settings
Here you can add the domain name of your store. You can add the domain name that you have purchased or you always have the free subdomains for all the portals and questionnaires assigned from Bask.
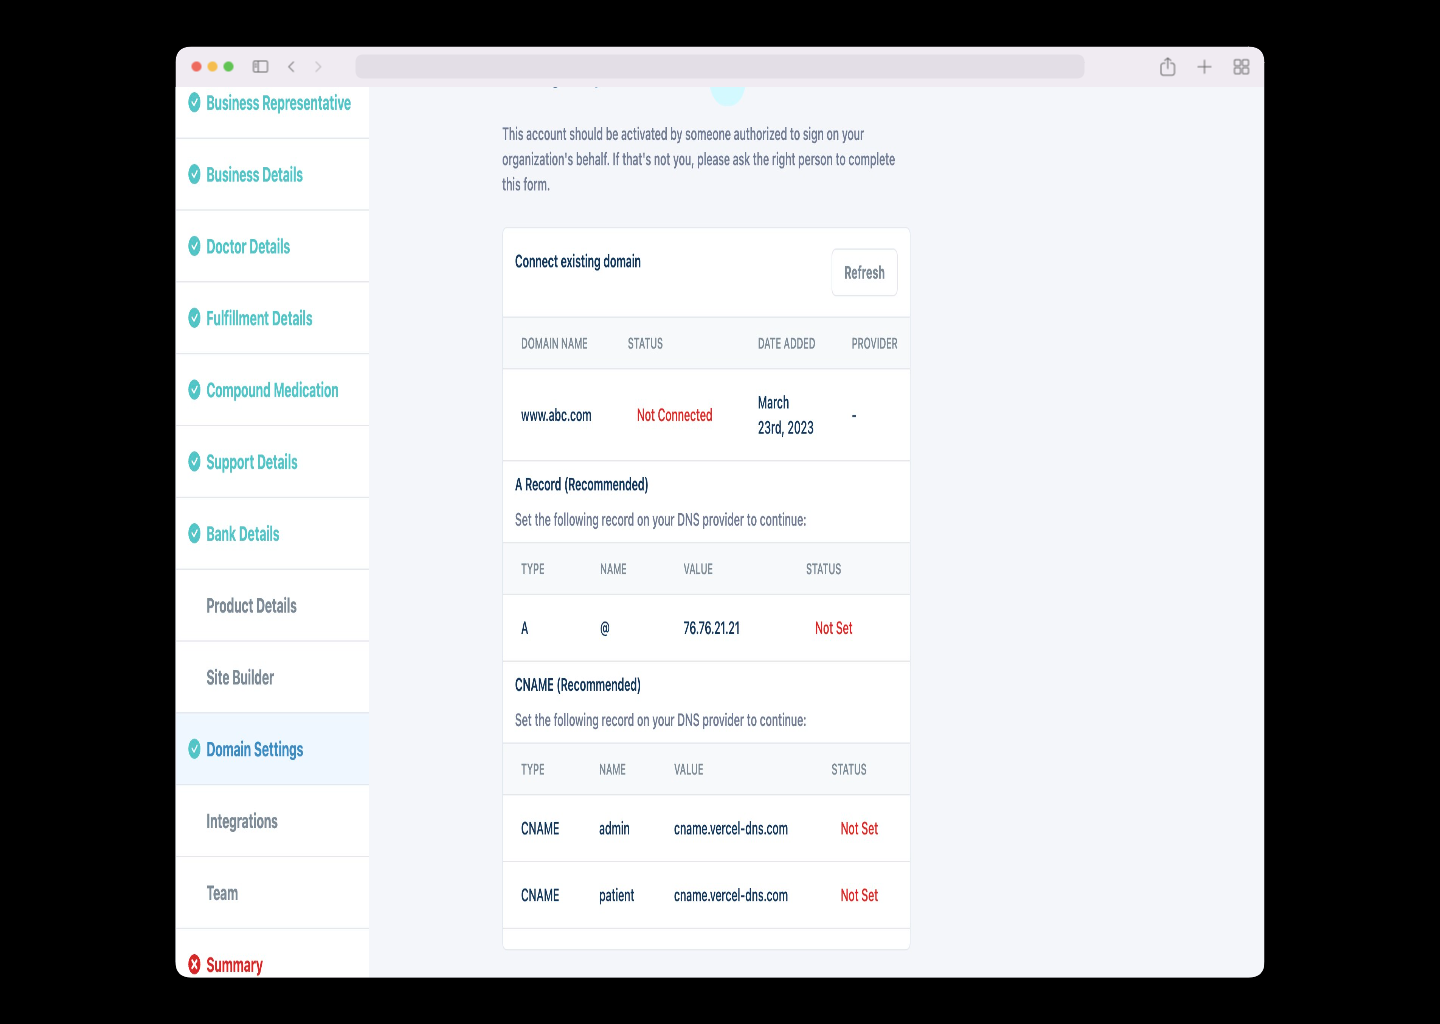
If you add your own domain name, you will have to add the domain name in the DNS settings of your domain name provider. To set it up you will have to add the records in your DNS settings as provided in the information box of the domain section.
Here you add your own domain name for questionnaires along with the customizable domain names for admin and patient portals. Then save the changes.

The next page as shown below will provide the details of the DNS records that you need to add in your DNS settings of your domain name provider. Once you set up the DNS records, you can check the status here, if it says connected, then congratulations you just finished setting up your own domain on Bask.
Team members
Here you can add team members to your store. You can add Admin, Doctor, Physician Assistant, and Customer Support by clicking on their corresponding section. If you have decided to use Bask Doctor group, you don't have to add the Doctor to the team(taken care by Bask).While adding new user you can select the role of the user and also the permissions that you want to give to the user. In future if needed you can always change permissions and details of the user and can even remove the user from the team.
Whenever a new user is added and the details are saved, the email invite will be sent to the user. The user will have to accept the invite and set up their password to access the store.
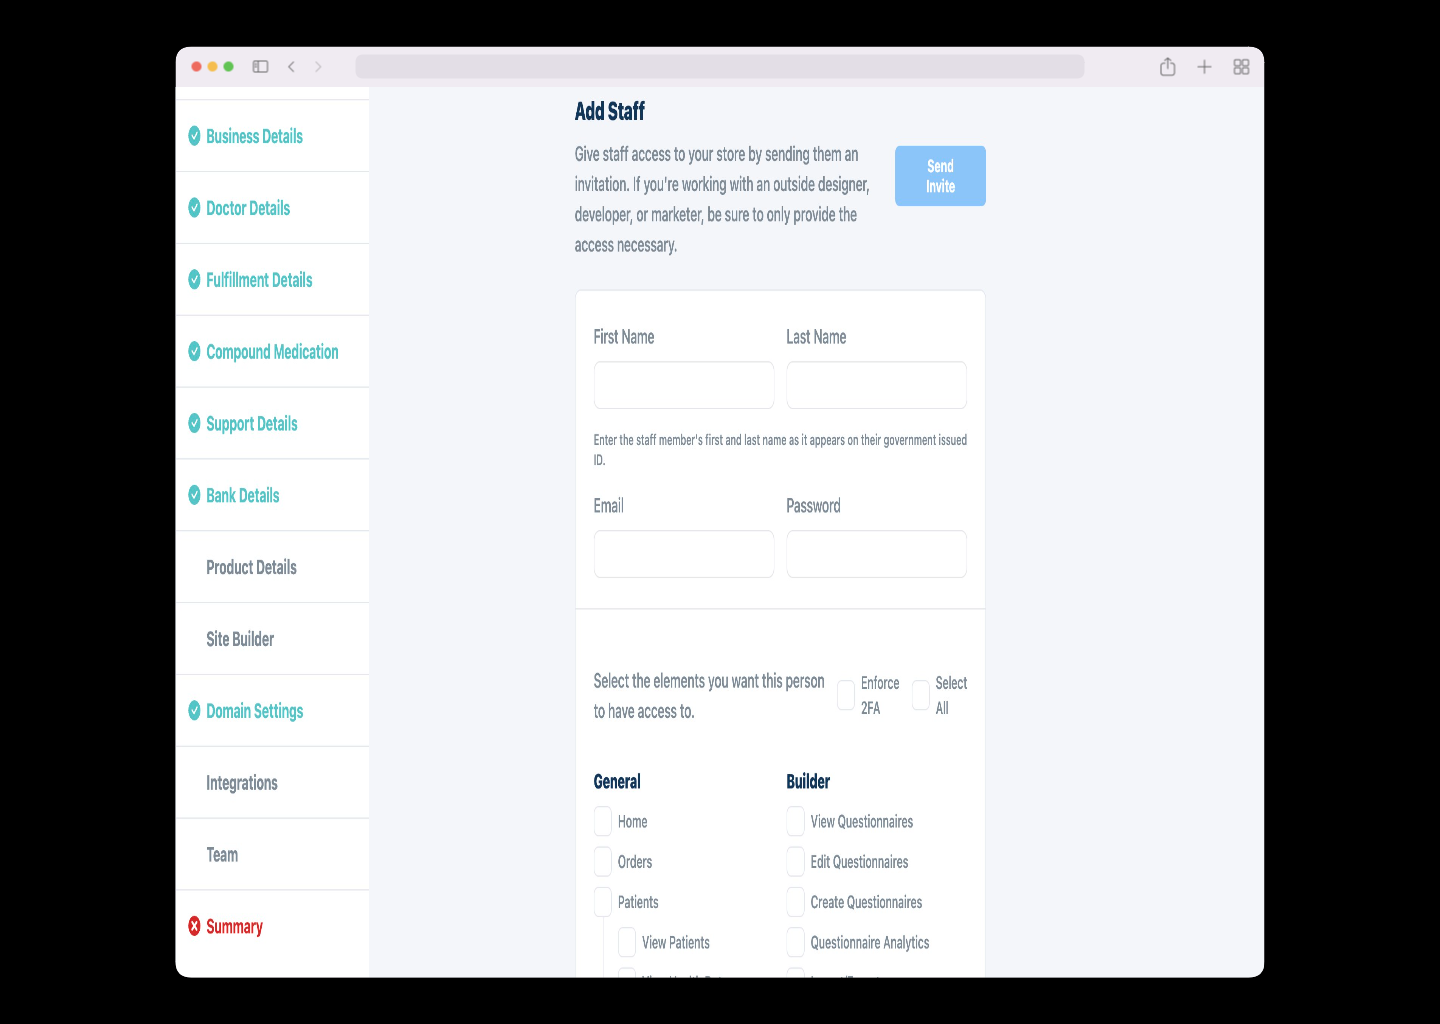
This page shows the list of all the team members that are added to the store. Go to the specific panel for example if you want to add admin click the Add staff button in the Admin panel.
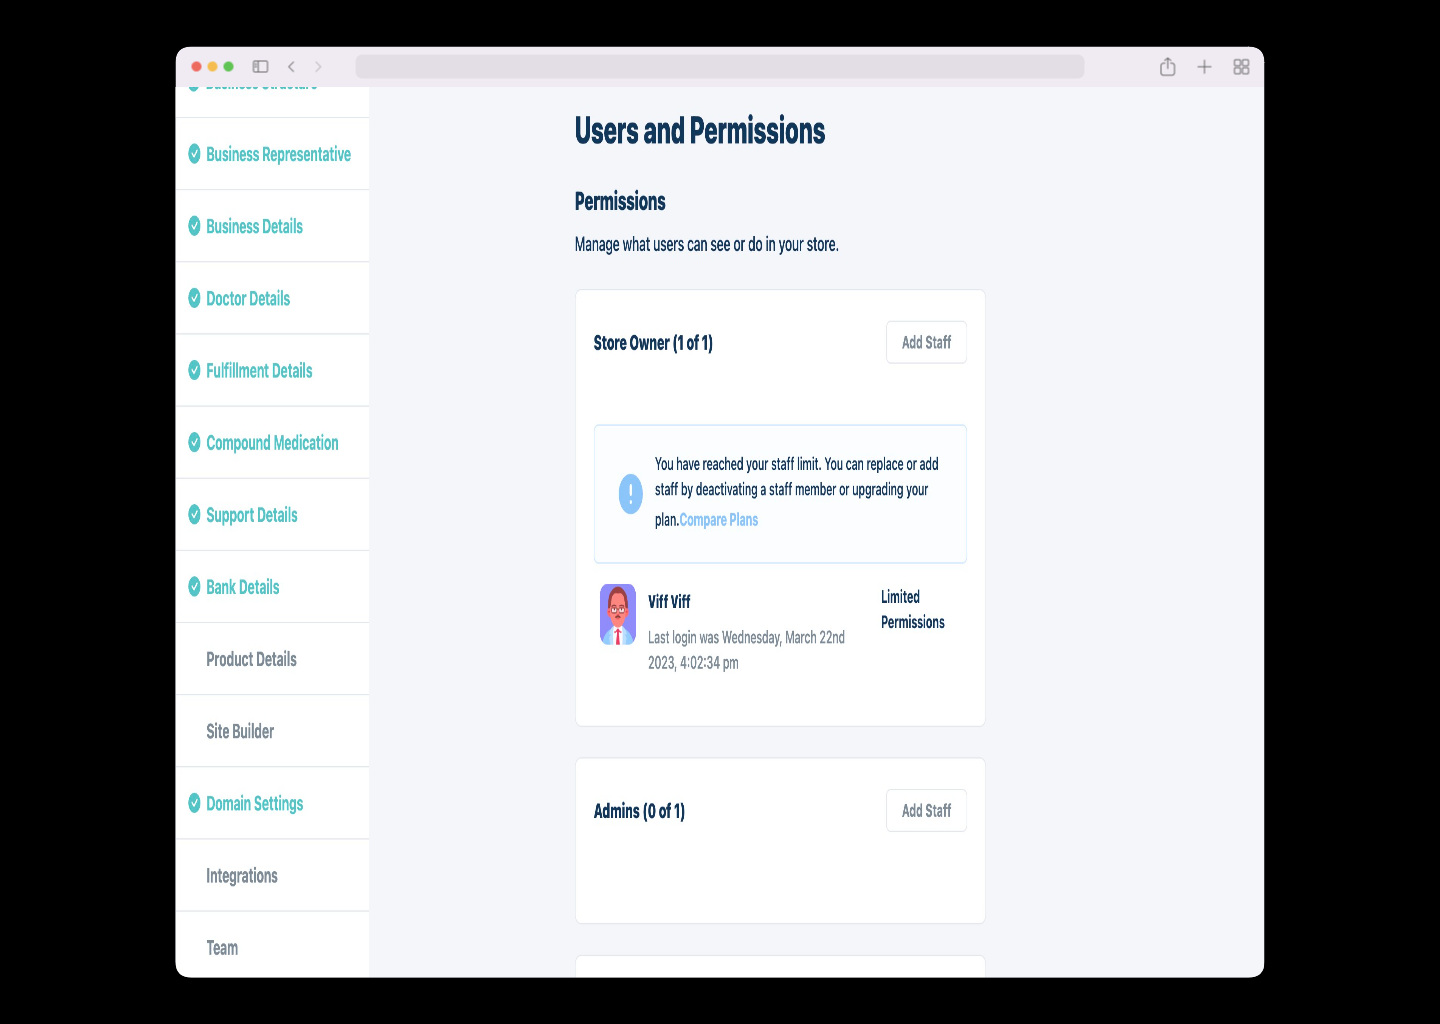
This is the admin panel, here you can add the details of that member and invite your team member through email by clicking Send invite button after filling out the details. Also in the details section you can add the permissions you want to give to that particular member and hit save.